Internal Use Agreements (Mobile App)

Internal Use agreements track the usage of your fleet for internal purposes (for example, an employee is moving a unit from one location to another, or training another employee, or refueling the vehicle). For more information about Internal Use agreements, see "Internal Use Agreements".

How to Open an Internal Use Agreement on Mobile

You must have Internal Use Service turned on by TSD. Contact TSD Support at support@tsdweb.com for assistance.

Quick Steps Full Walkthrough

Quick Steps

1

Tap > ,

 
2

Fill in details (such as driver, reason, and target location) and scheduling.

3

Assign a unit and tap Checkout Inspection to take photos and mark damage

4

Tap Open to complete the agreement.

Full Walkthrough

1. Begin the Open Process from the Menu

Tap > .

2. Fill in Details and Scheduling

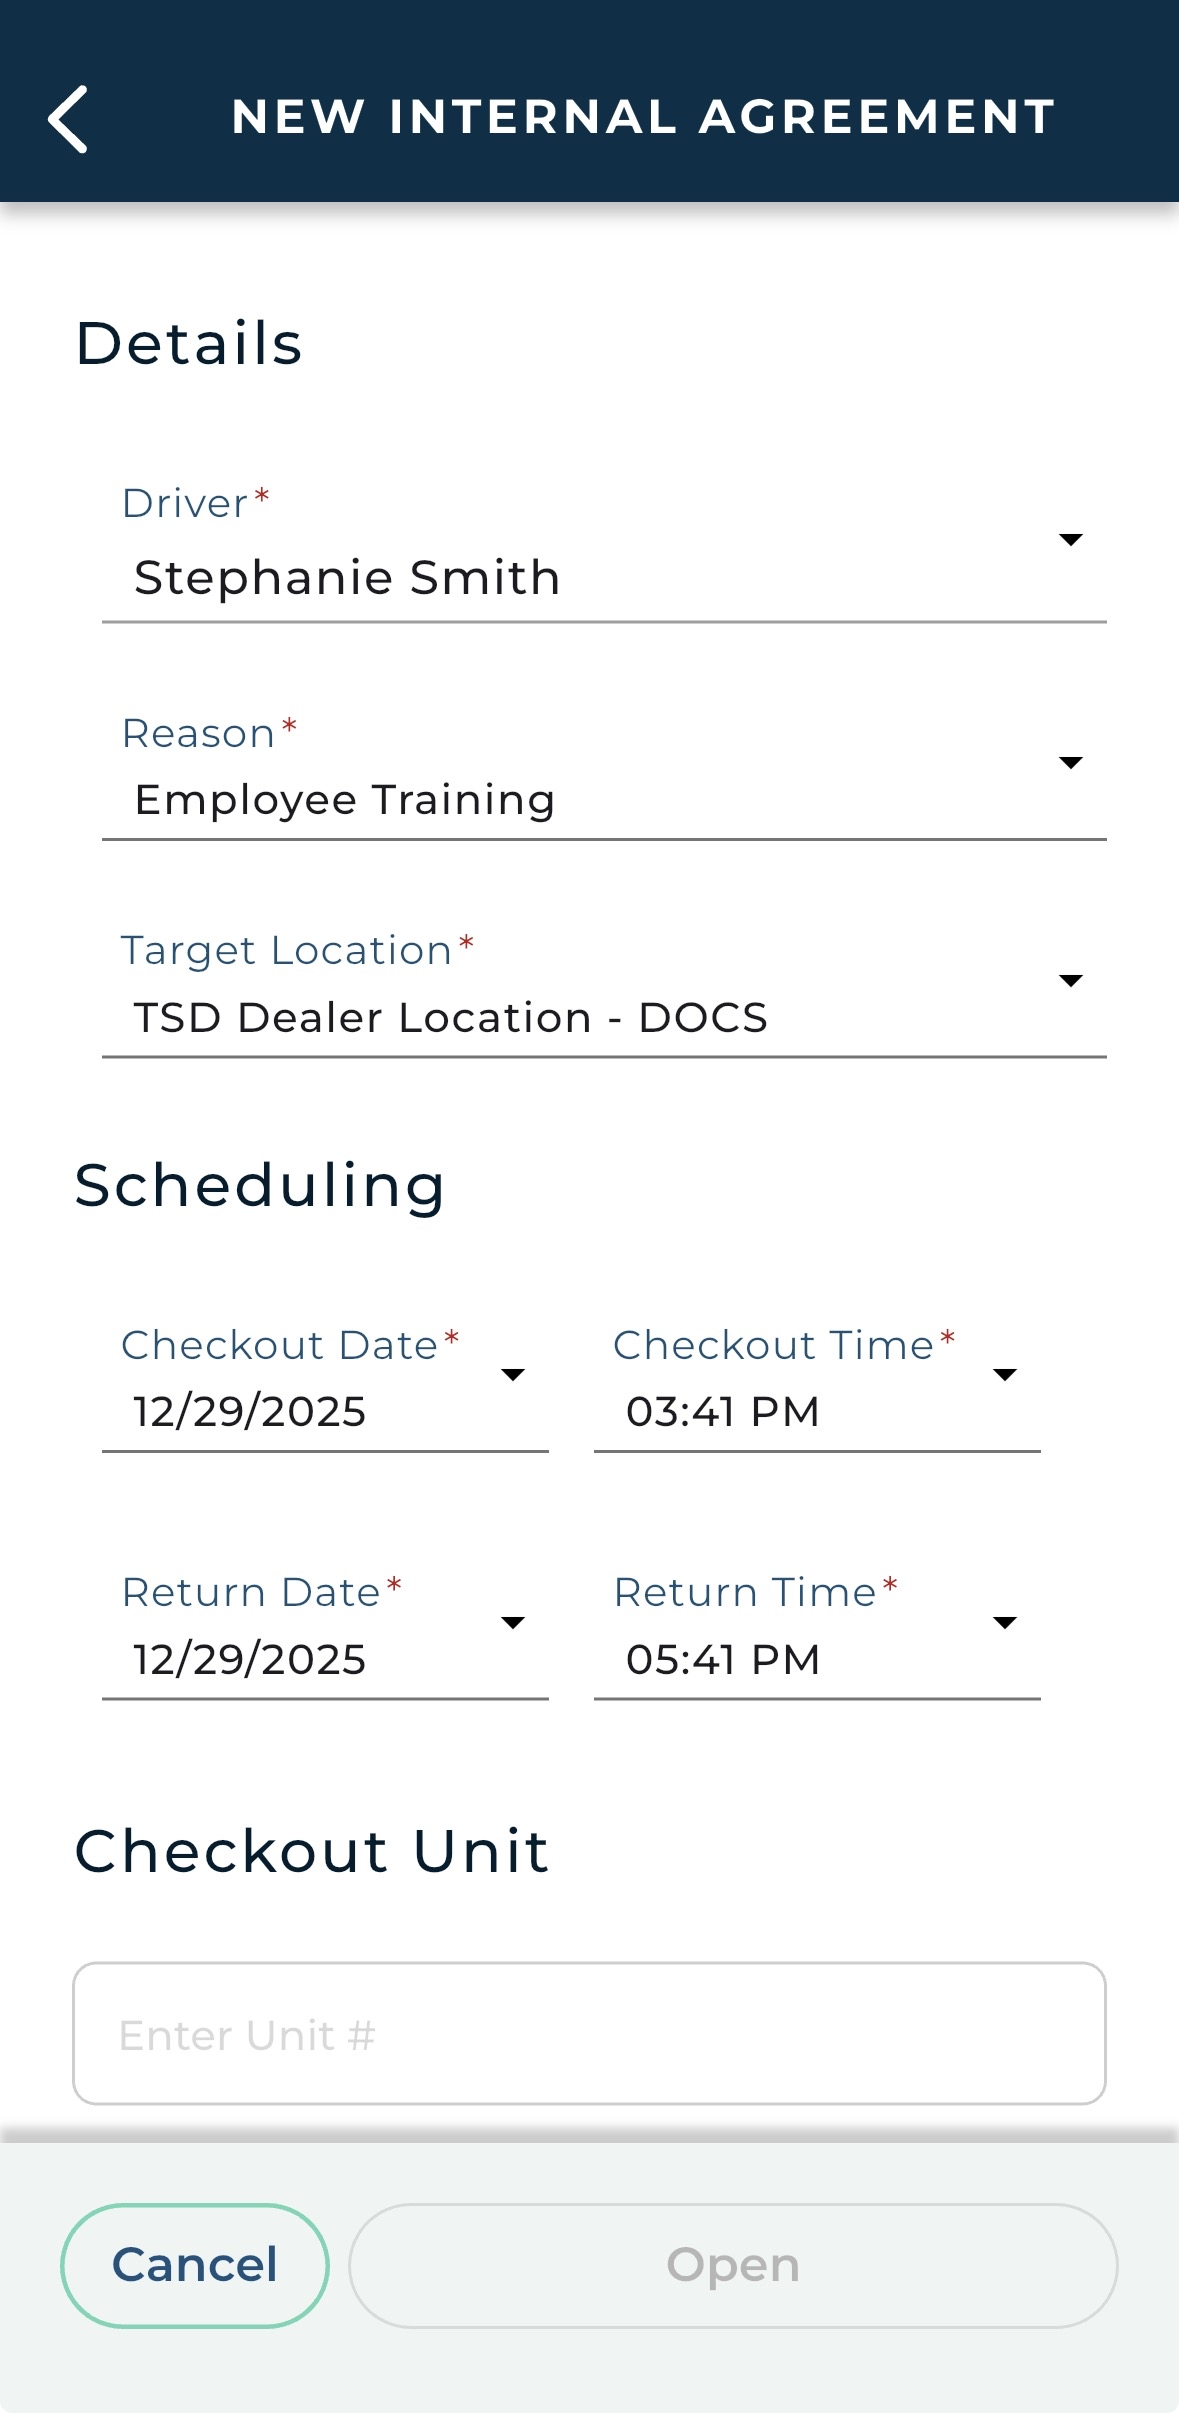
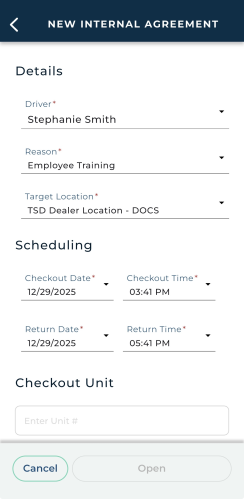
  1. In the Details section, fill in all required fields, including a Driver, a Reason for the unit usage (e.g., Transfer to Another Office), and the Target Location to which the unit is being driven.
  2. In the Scheduling section, verify the Checkout Date and select a Return Date of no more than 29 days into the future.
3. Checkout: Assign a Unit

Choose how you want to add a unit to this agreement:

  • Type the full, exact Unit Number and tap Add Unit. (After a unit is assigned, this button becomes Replace Unit).
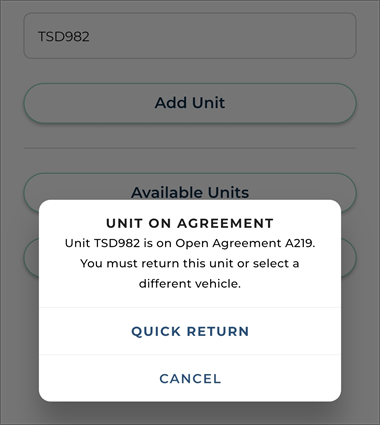
  • Quick Returns: If you enter a unit that is In Use on another agreement, the app displays the option to perform a quick return to free up the unit. After the agreement is closed or close pended, you are returned to the current agreement with the unit now assigned.

    Hover to view the full-sized image.
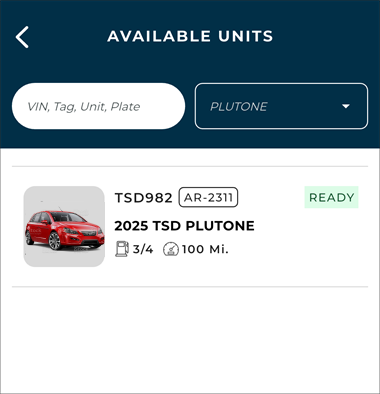
  • Select from a list of Available Units. The list is available for searching by VIN, Unit Tag, Unit Number, or Plate, and filtering by Model.

  • Hover to view the full-sized image.

  • Scan a QR code or VIN barcode by tapping Scan QR Code or VIN Barcode.

(After a unit is assigned, you can replace it, if needed, using any of the above methods.)

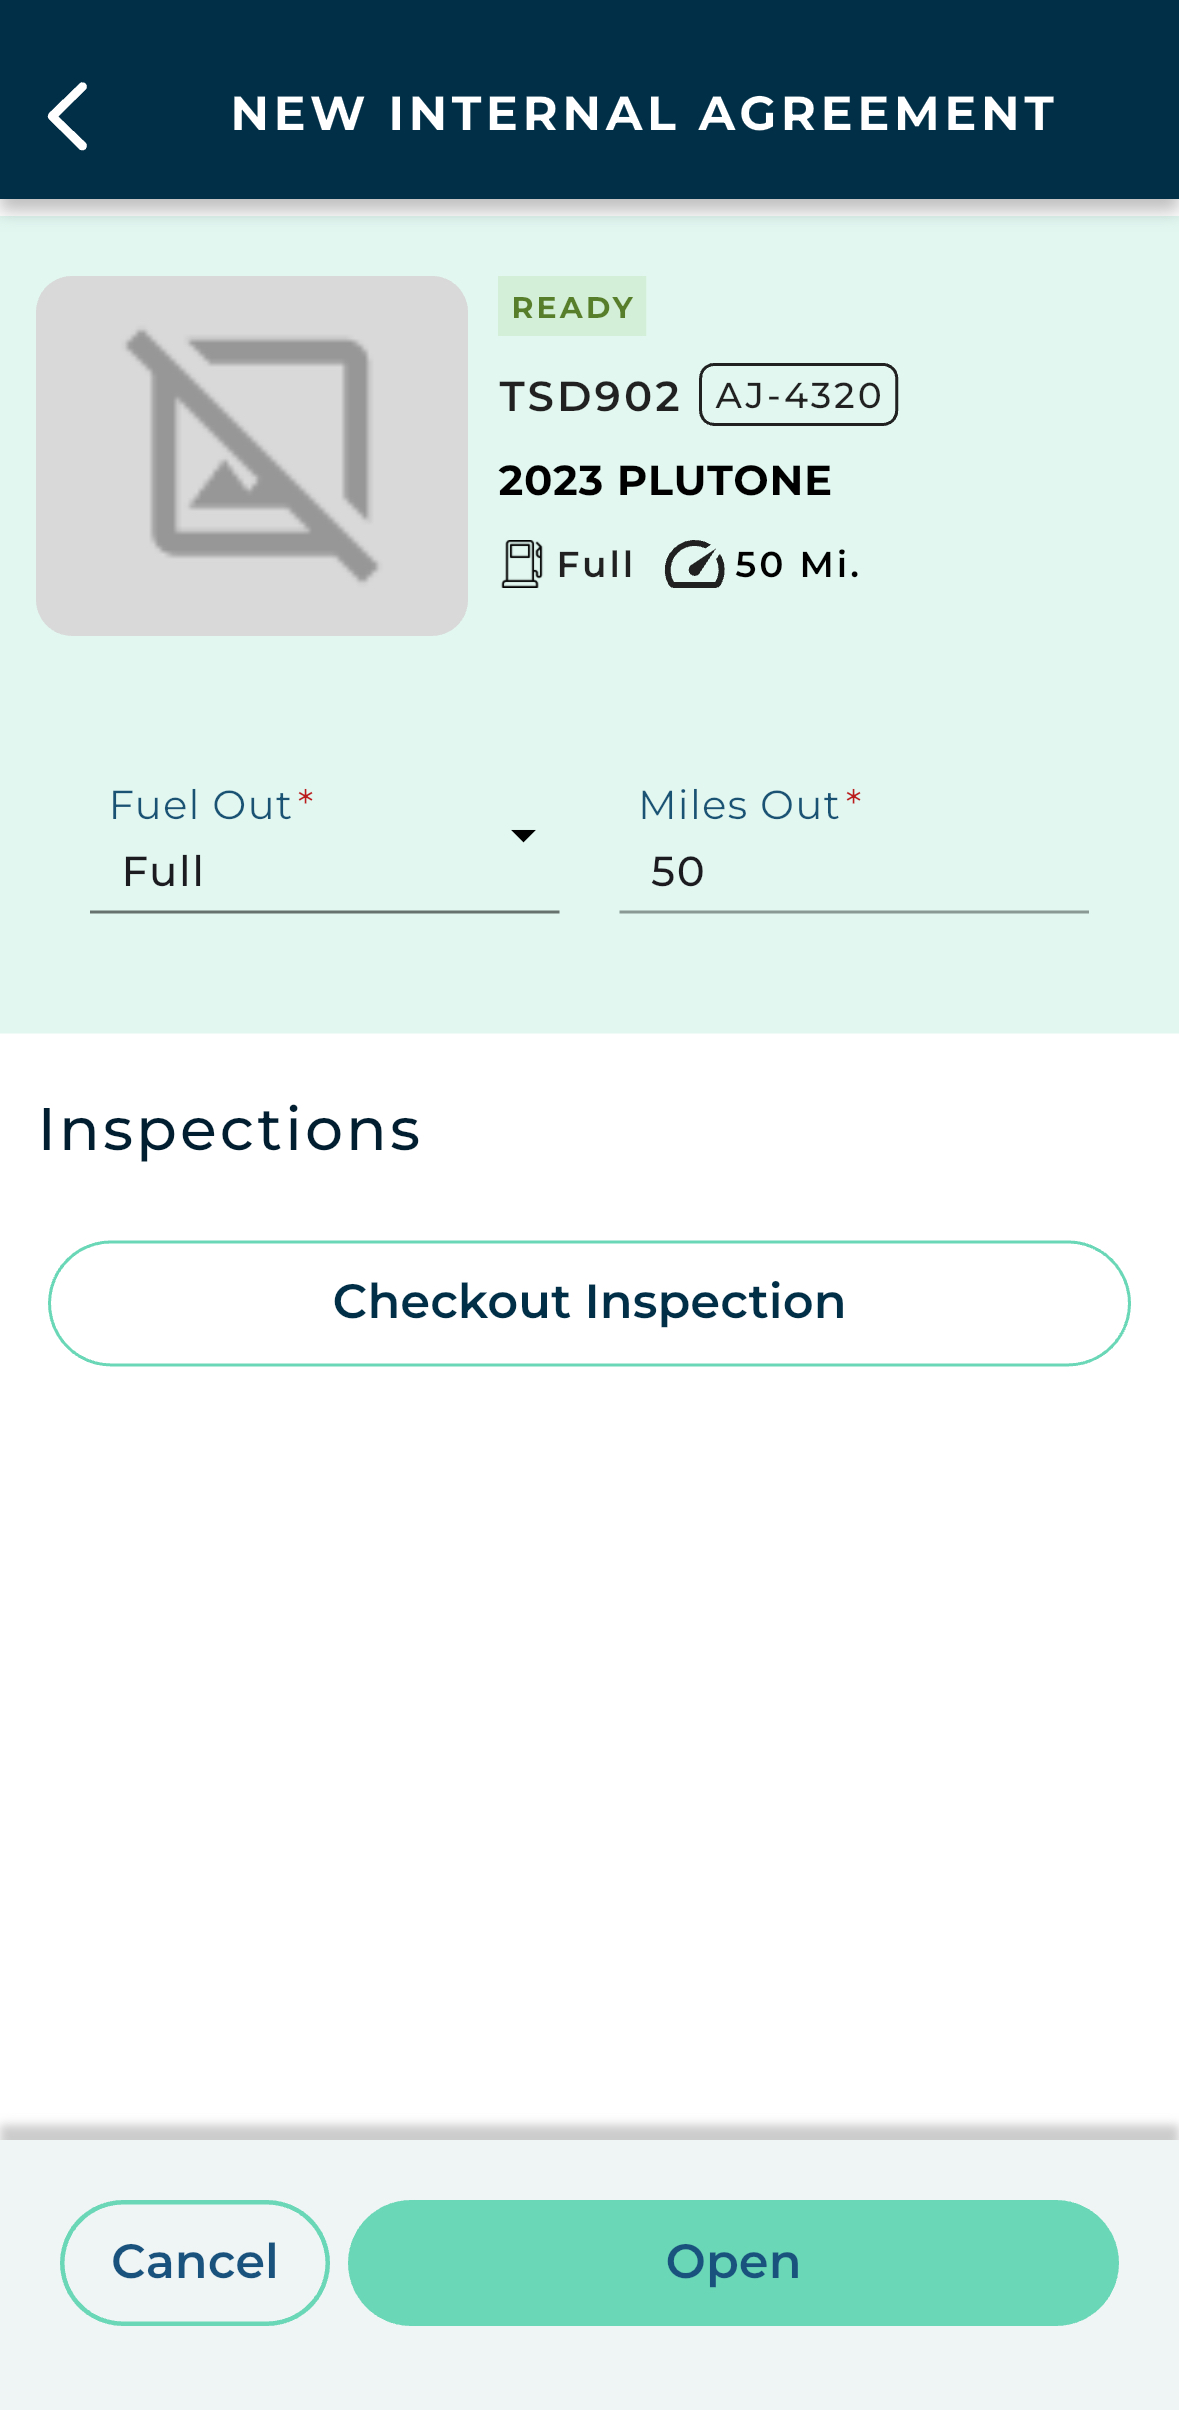
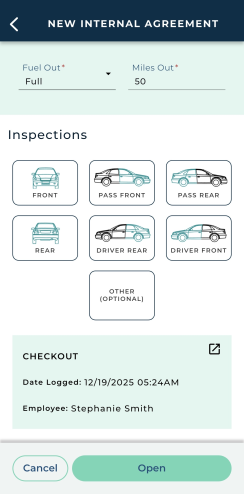
Verify the assigned unit's Fuel Out / Battery Out and Miles Out.
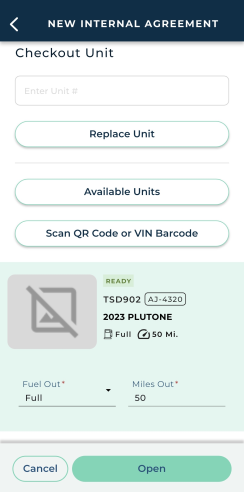
4. Inspect the Unit

Tap Checkout Inspection to perform a checkout inspection of the unit and take photos and mark damage, as needed, for all listed zones of the vehicle.
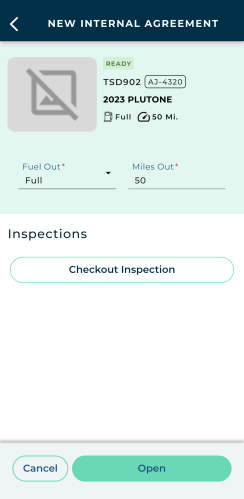
ClosedHow to inspect the unit:

The availability of unit inspections on agreements is based on the Enable Agreement Inspection management setting.

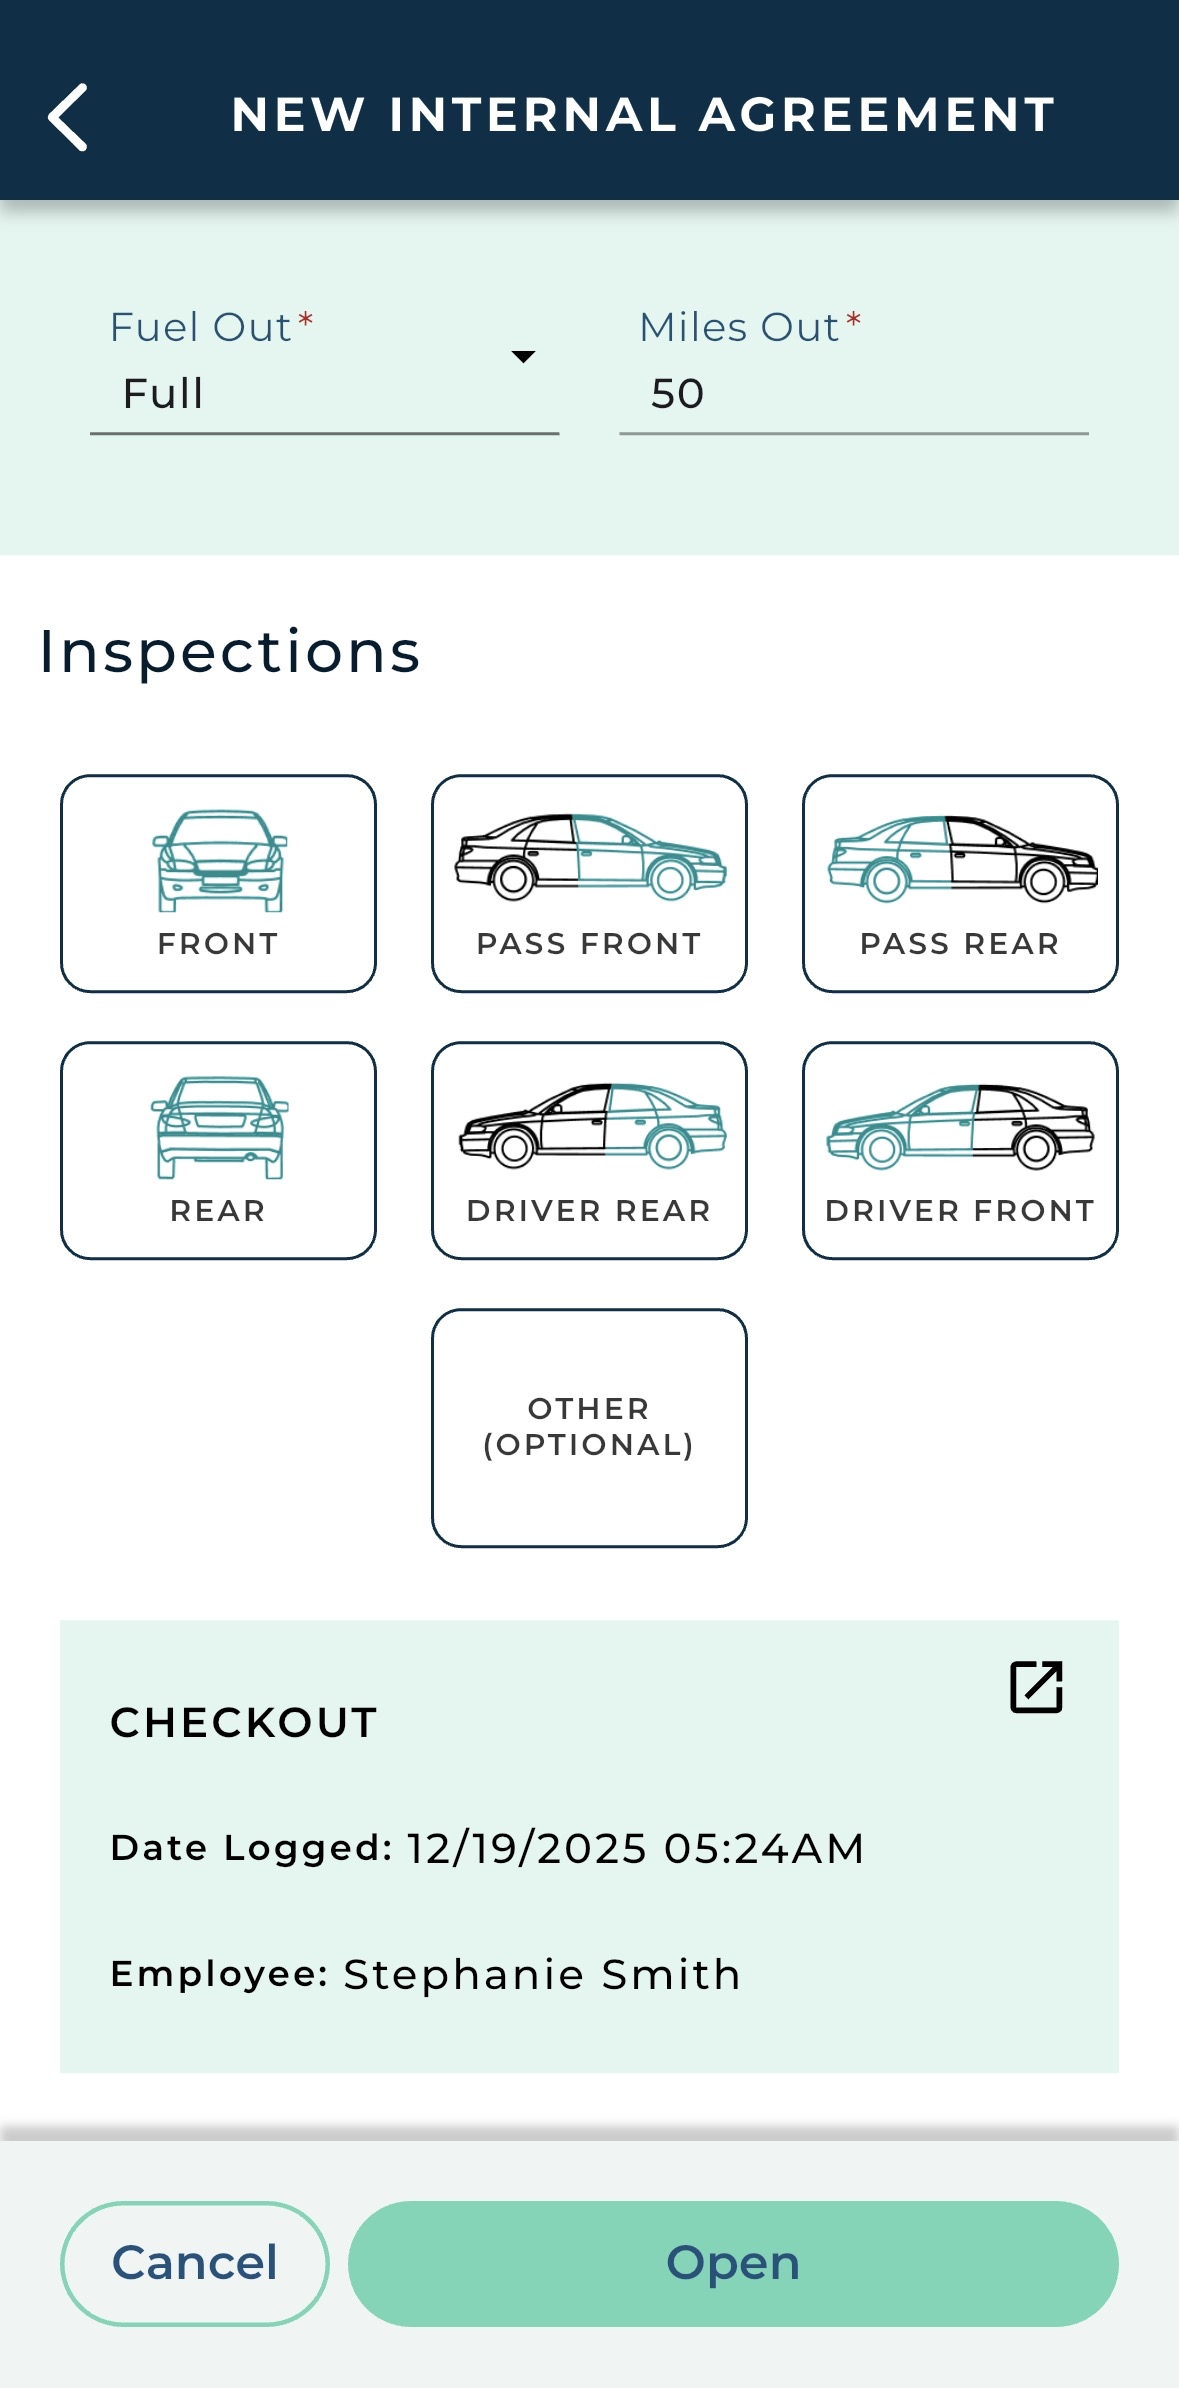
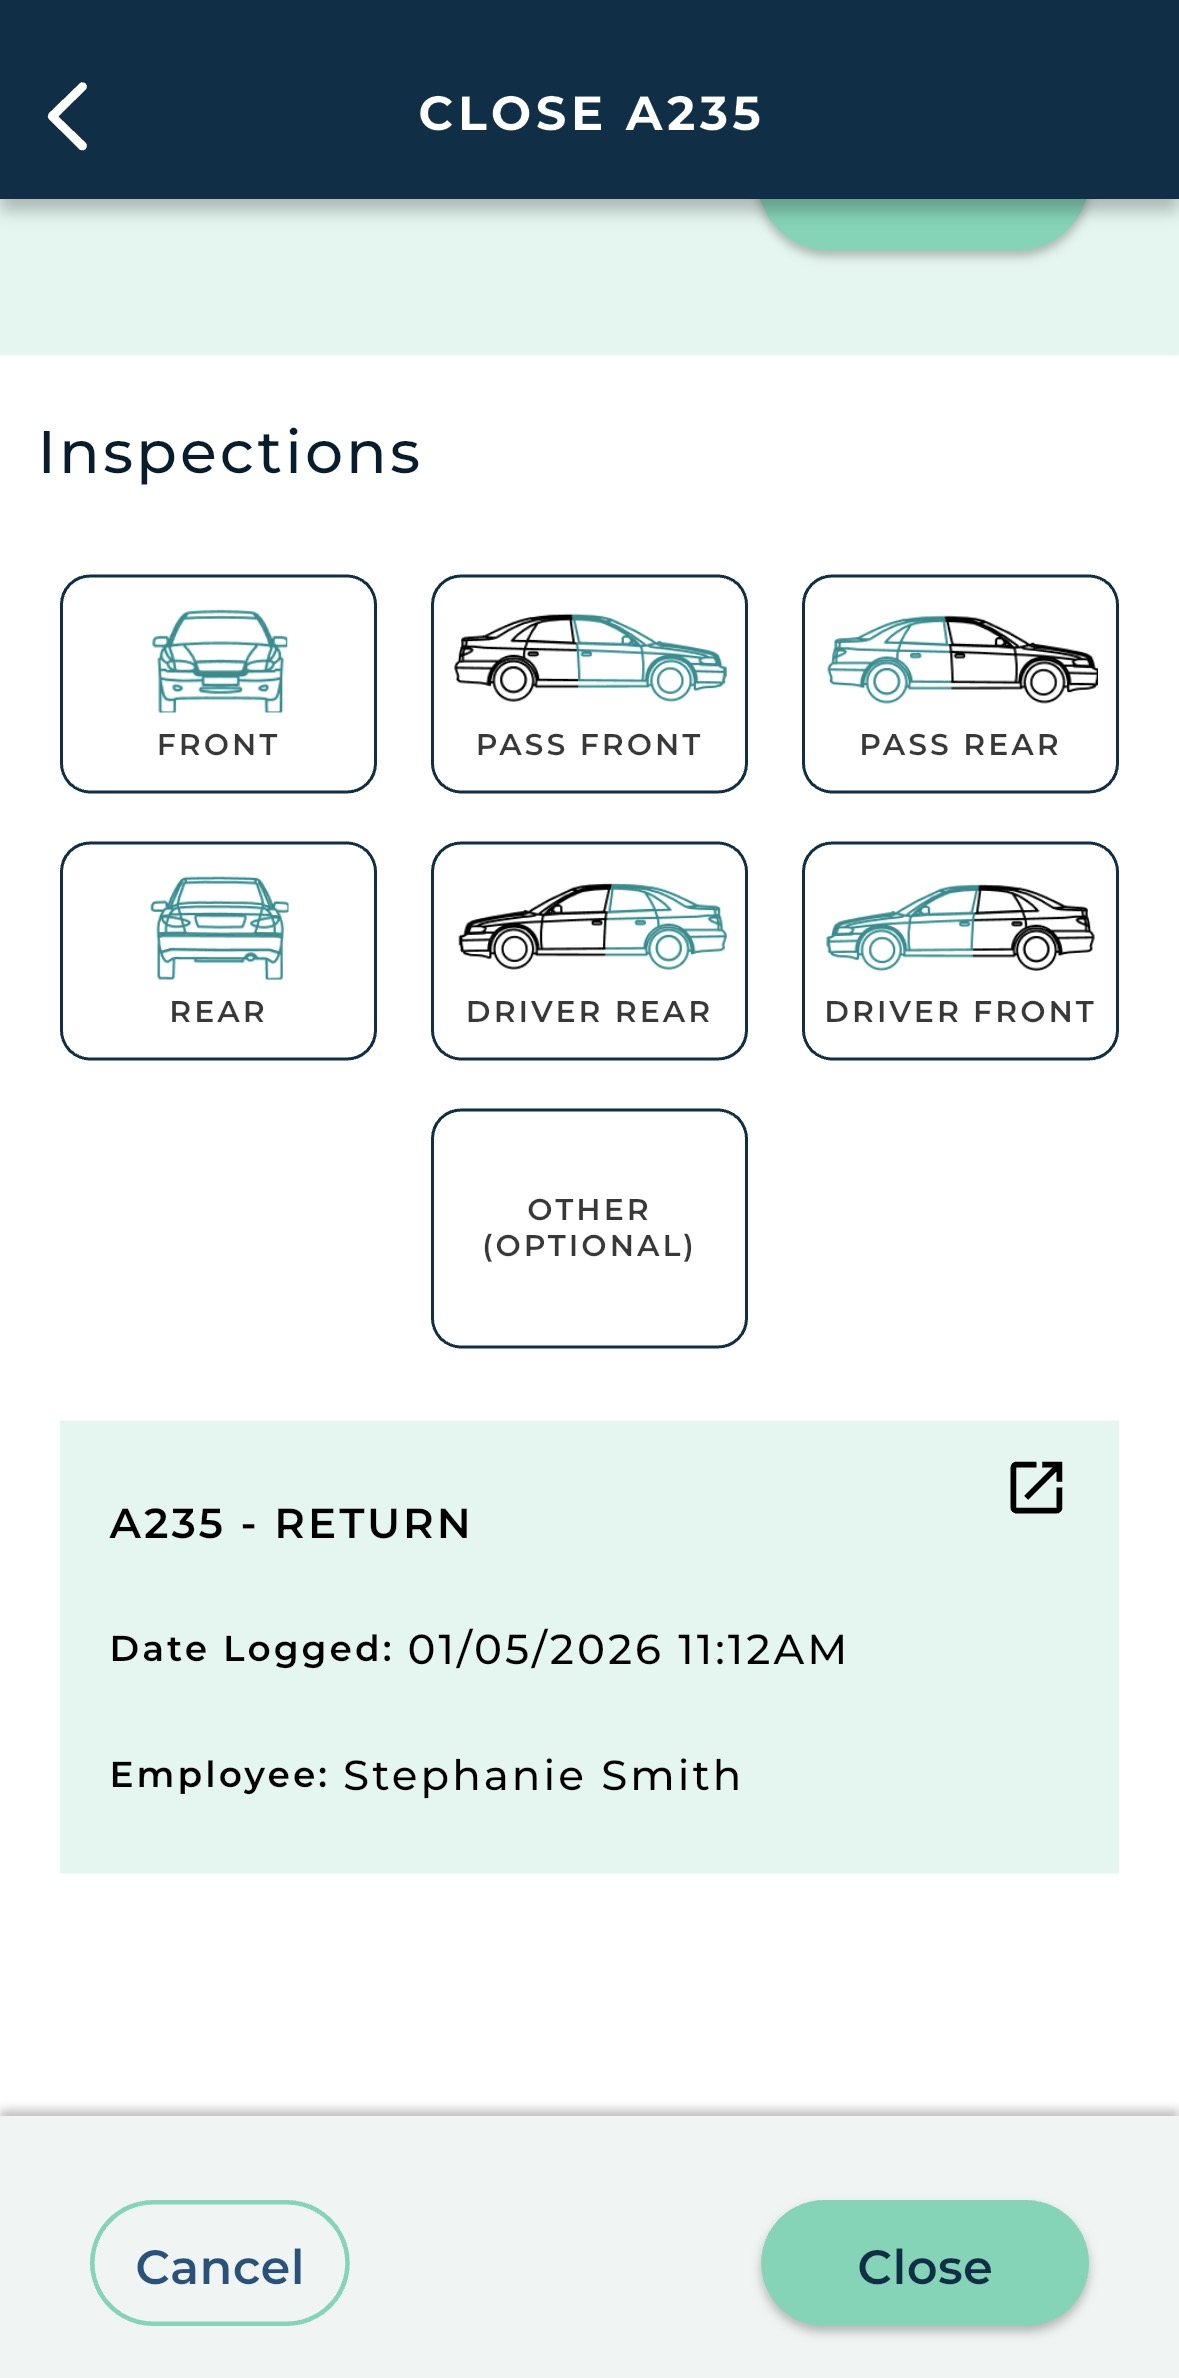
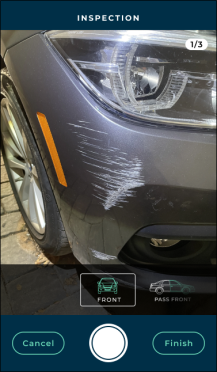
During this inspection, you'll take up to three (3) photos and mark damage, as needed, for all listed zones of the vehicle: Front, Passenger Front, Passenger Rear, Rear, Driver Rear, Driver Front, and Other (i.e., the roof).

  1. Start your walkaround from the front of the vehicle.
  2. Aim your device's camera at the vehicle zone, and tap the Shutter button to take a photo. (If you need to retake the photo, tap Cancel and take it again.)
  3. Tap the Shutter button to take a photo.

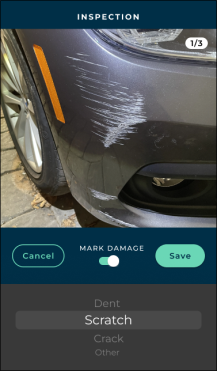
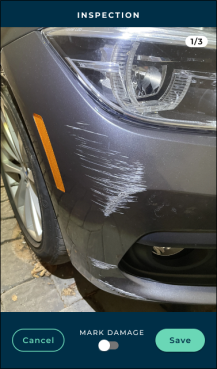
  4. To note damage in the photo, tap MARK DAMAGE , and select the type of damage (e.g., dent, scratch, crack, or other).
  5. Mark damage, if needed.

  6. Tap Save. Both the photo and the damage entry, if noted, are saved.
  7. Repeat as needed, taking up to three (3) photos, total. (The number of photos saved for the zone is displayed in the upper right corner.)
  8. Tap or scroll to the next zone (e.g., Pass Front), and repeat the above for all listed zones, as required. (If inspections are required at your location, you must take at least one photo of each zone.)
  9. When finished inspecting the vehicle, tap Finish.

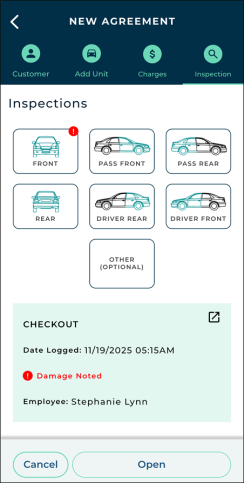
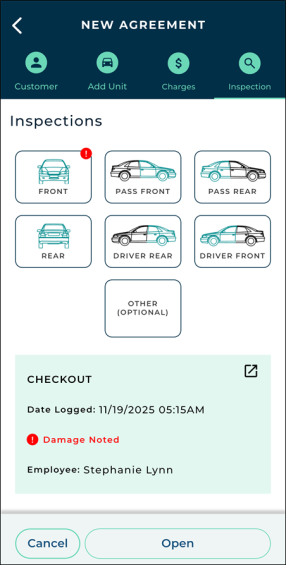
When you've finished the inspection and returned to the agreement, a summary of the checkout inspection is shown, including Date Logged and Employee who performed the inspection.

Inspection summary on the agreement.

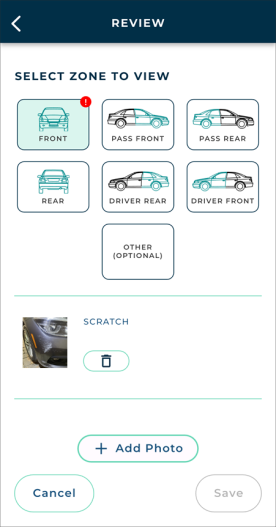
Before you move on with this agreement, you can tap the Details icon () within the summary to review this inspection for each zone. When doing so, you can do the following:

  • Tap a zone to view or delete photos. (Tap a thumbnail to view the full size.)
  • Tap + Add Photo to add a photo (up to three (3), total), and note additional damage, as needed.

If you make any changes when reviewing an inspection, tap Save.

Review inspection.

5. Open the Internal Use Agreement

Tap Open to complete (save) the open Internal Use agreement.

The agreement is opened! You are returned to the Home screen, where a brief confirmation message is displayed in the bottom left corner.

How to Close an Internal Use Agreement

You can use the mobile app to close an Internal Use agreement when the unit is returned.

Quick Steps Full Walkthrough

Quick Steps

1

Access an agreement from the Dashboard or tap Close, then scan the unit or search for the agreement.

2

Fill in return information (service details, scheduling).

3

Verify returning unit details and tap Save.

4

Tap Return Inspection to take photos of the returning unit and mark damage.

5

Tap Close.

Full Walkthrough

1. Start the Close From 'Home' (Scan or Search)

You can begin the close process from several places in the app. Choose whichever is most convenient for you.

ClosedOption 1: Scan a Returning Unit / Search.

  1. Tap Close.
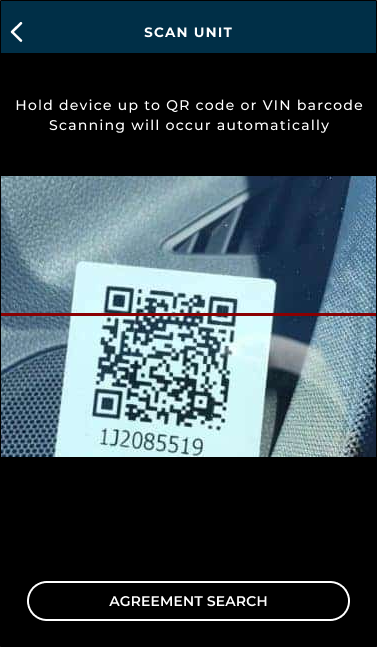
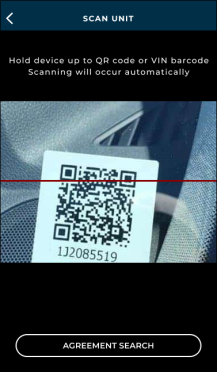
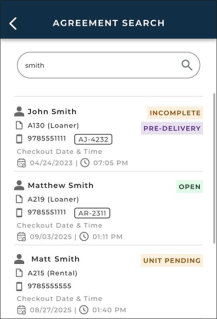
  2. Your camera opens automatically. You can scan the returning unit's QR Code or VIN barcode, or tap Search to exit the scanner and manually look up the agreement by customer name, Unit Number, Plate Number, Tag Number, Agreement Number, or RO Number.
  3. Scan a unit

    Search for an agreement

ClosedOption 2: Start from the Dashboard & Search.

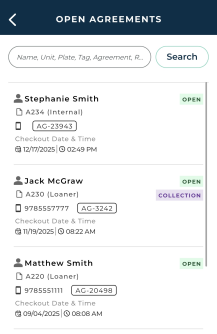
  1. Tap Open Agreements or Due In.
  2. Select the agreement you want to close. (Use the search feature, as needed, to narrow results.)
  3. Tap CLOSE from the available actions.

2. Fill in Returning Information

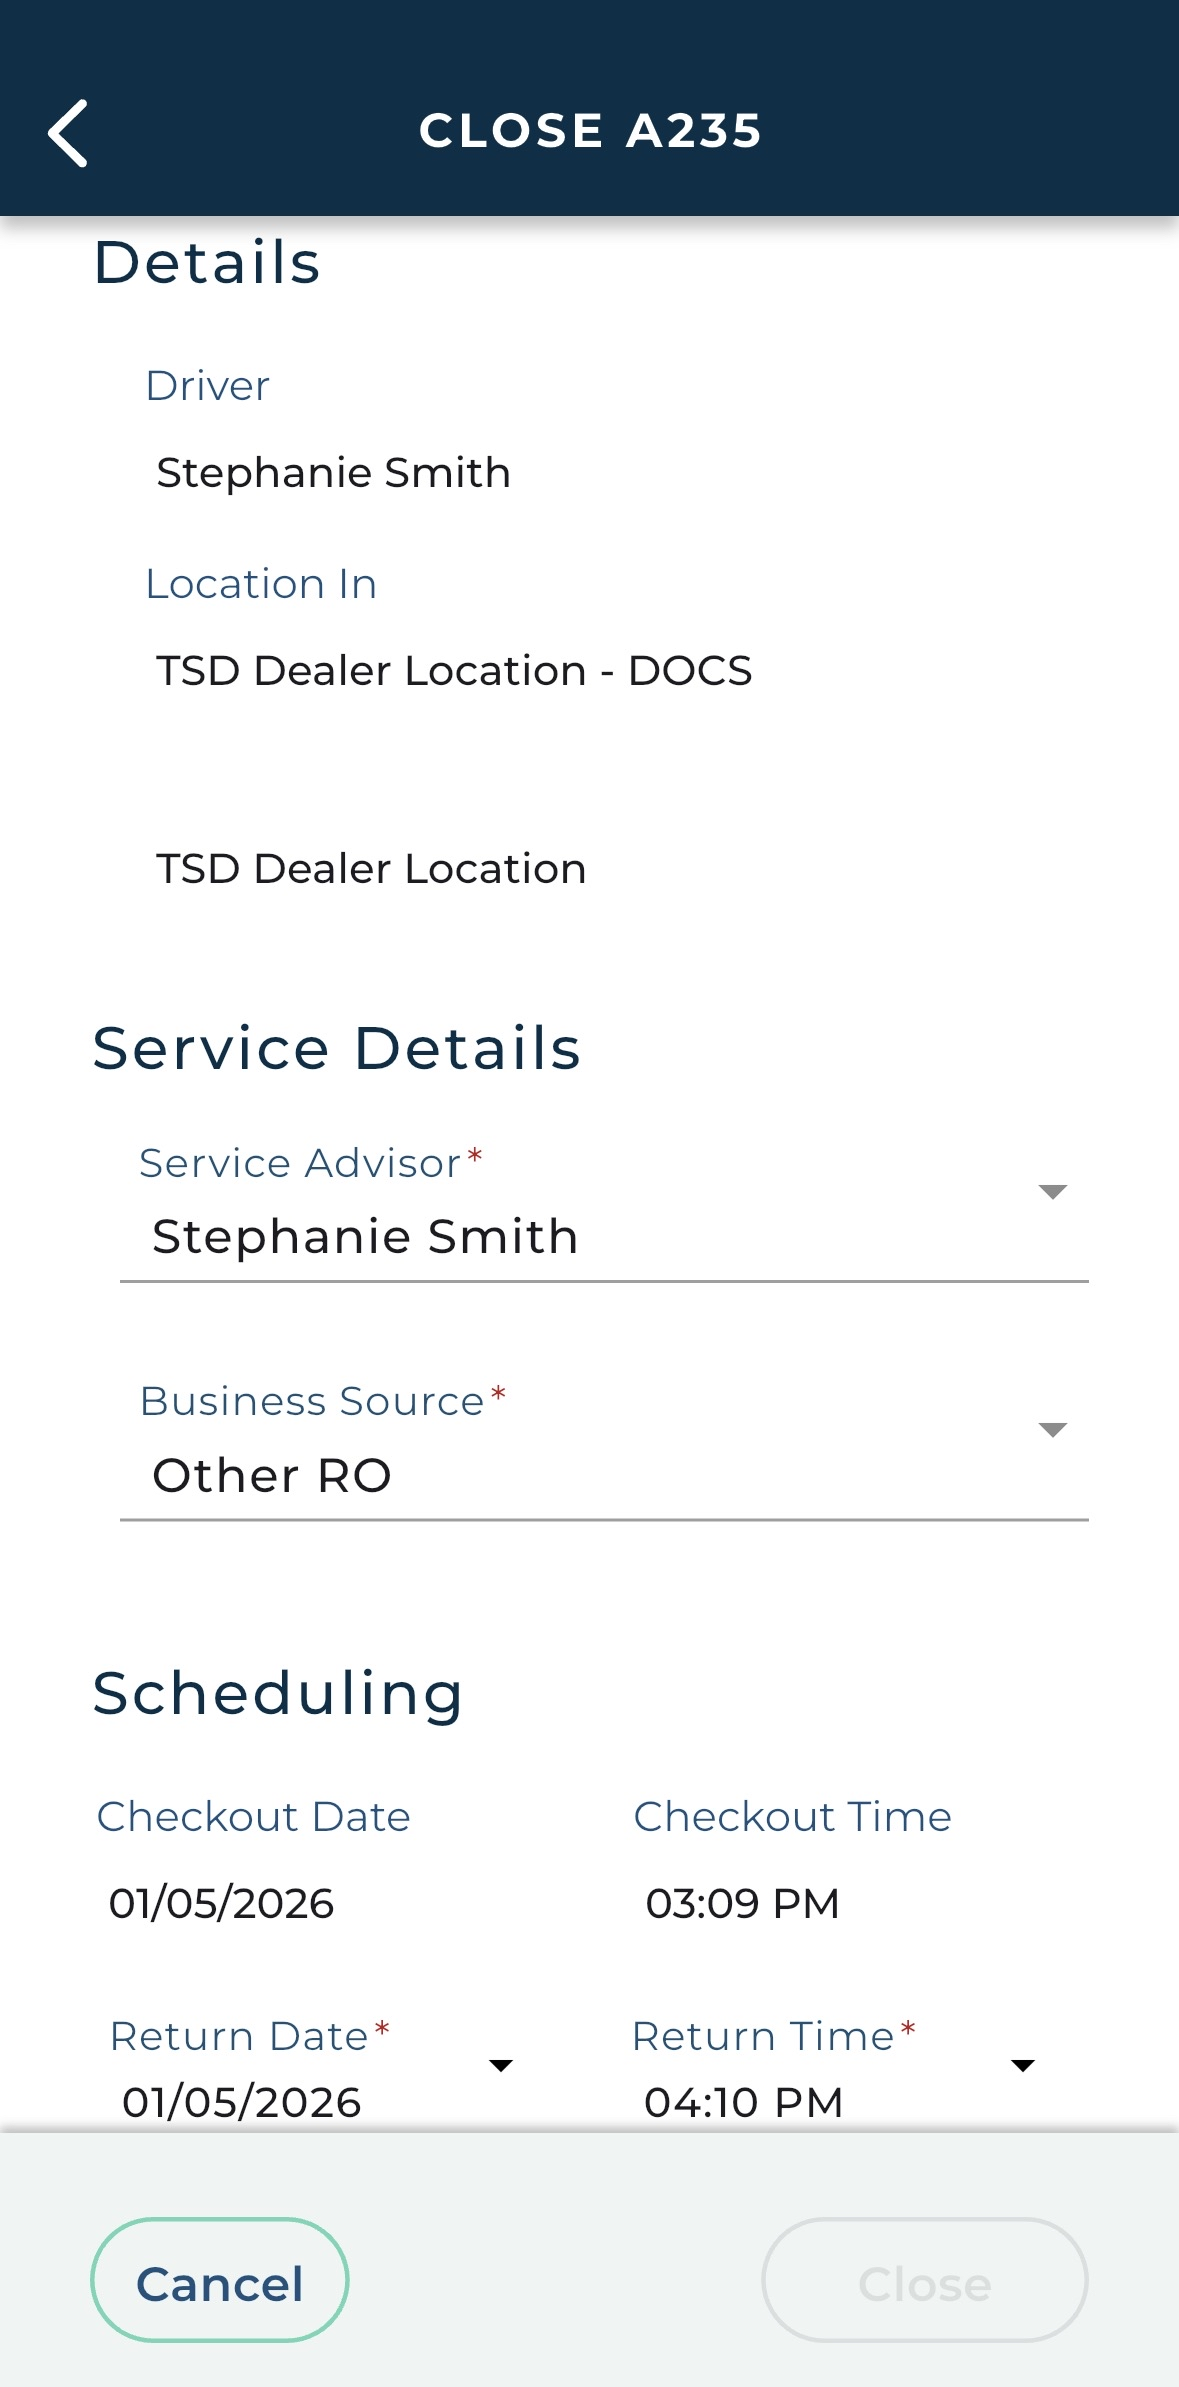
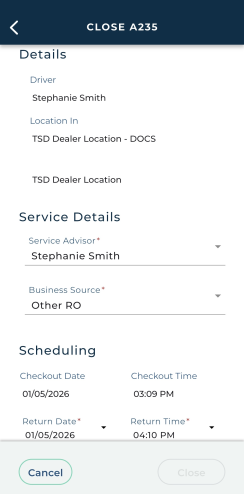
Key agreement information is displayed at the top: Driver and Location In.

  1. Fill in the Service Details, including Service Advisor and Business Source.
  2. Verify the Scheduling information (Return Date and Time).


Hover to view the full-sized image.

3. Verify the Fuel / Battery and Mileage

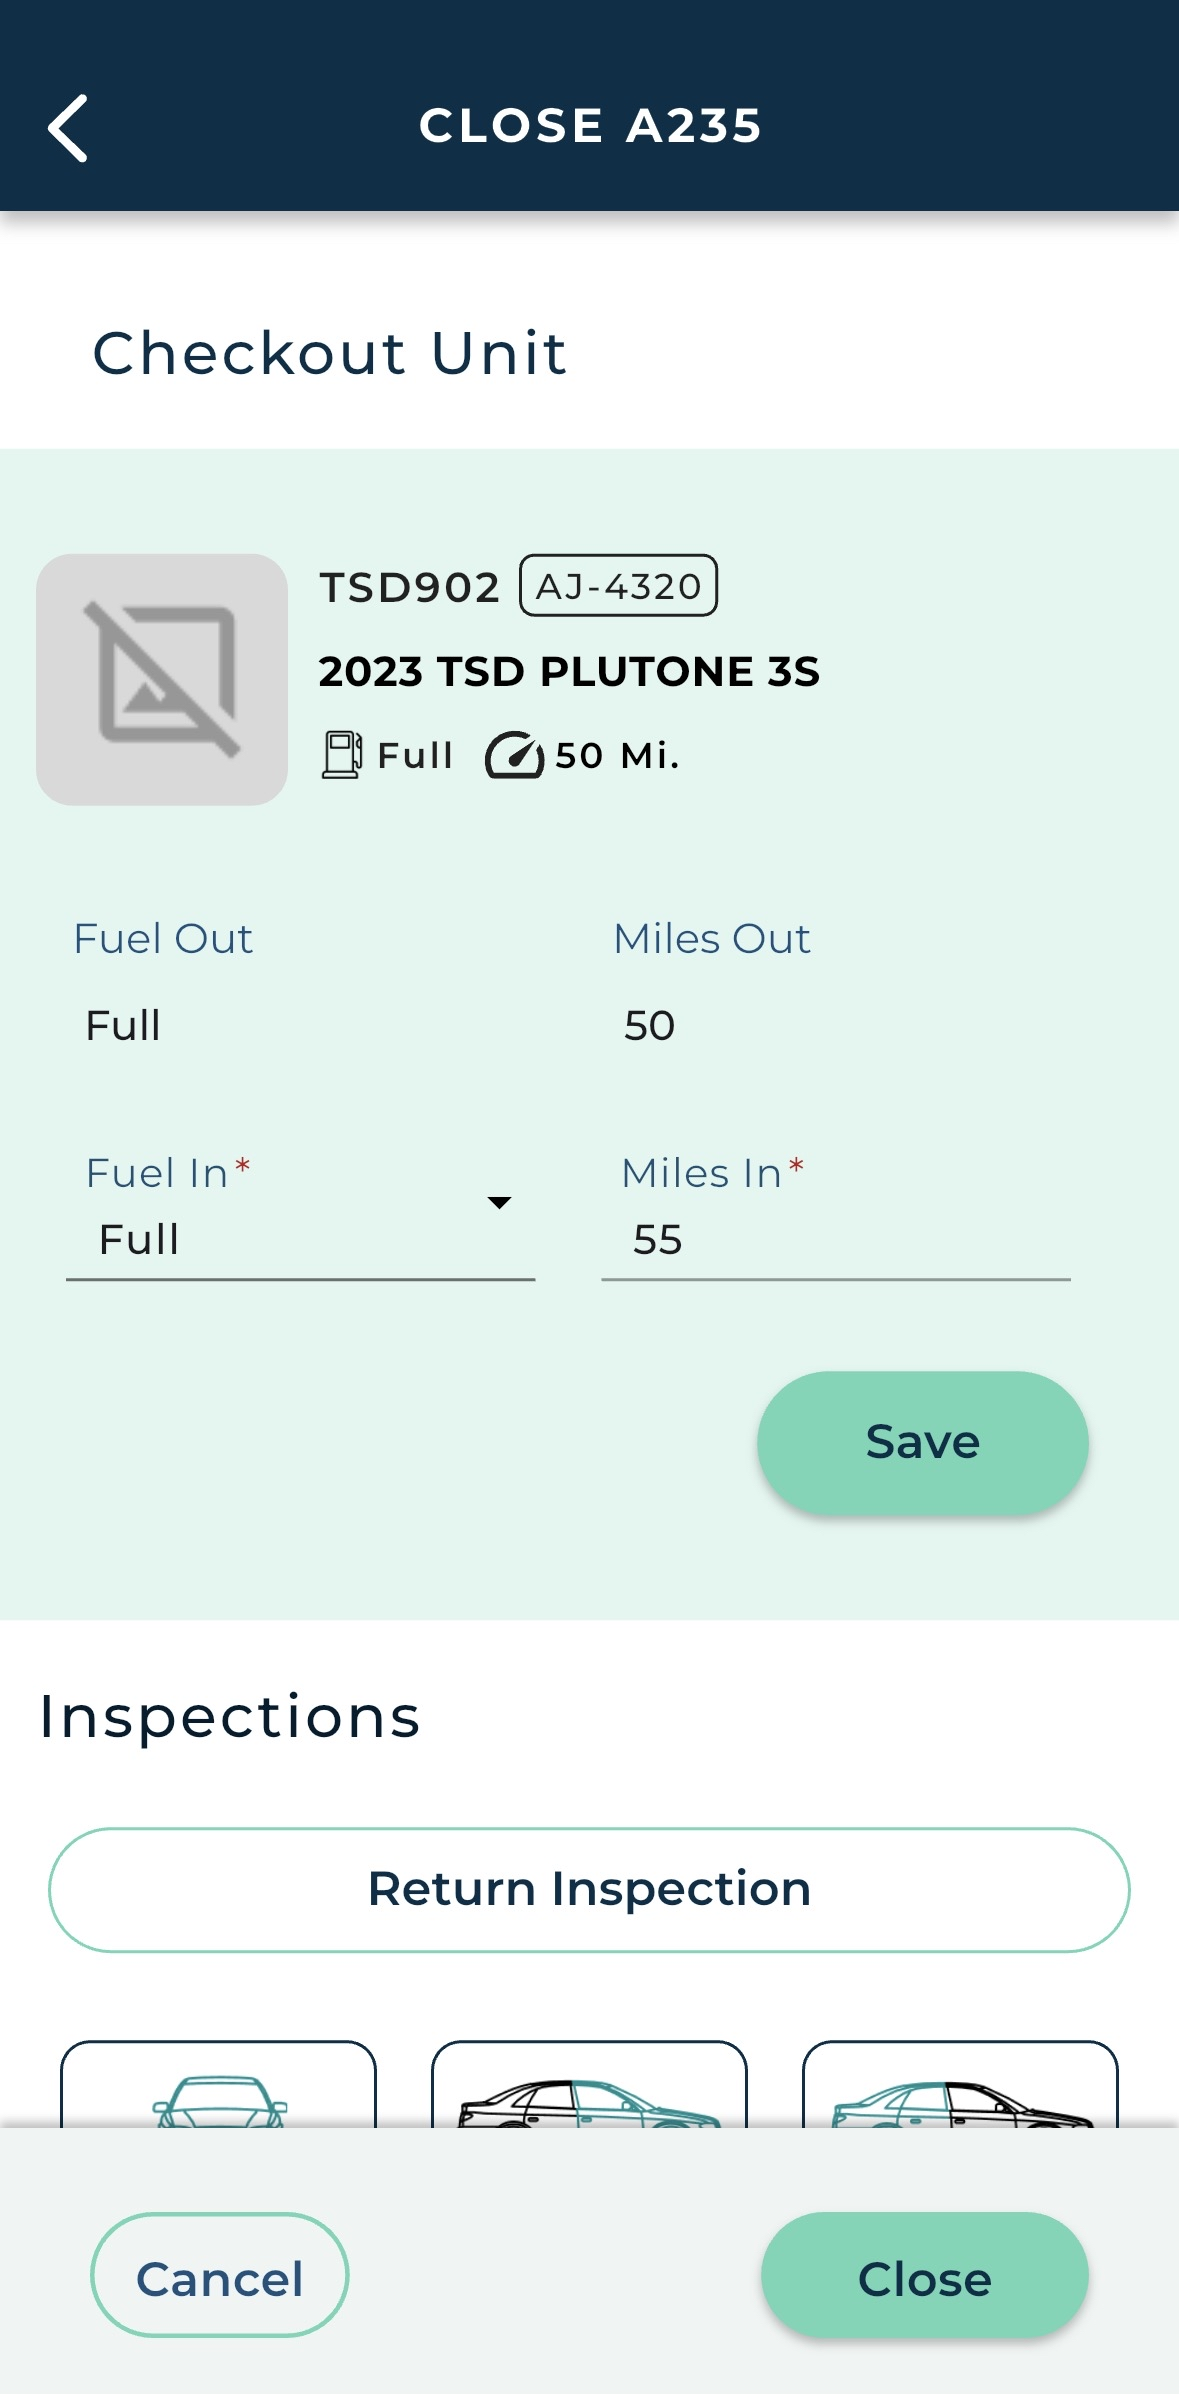
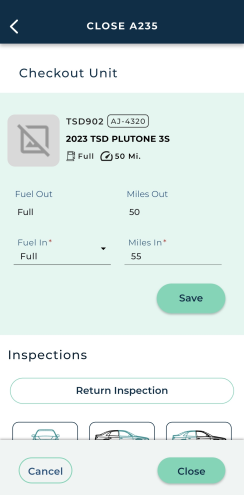
Verify the returning unit information, such as Fuel / Battery In and Miles In. Tap Save.


Hover to view the full-sized image.

4. Inspect the Unit

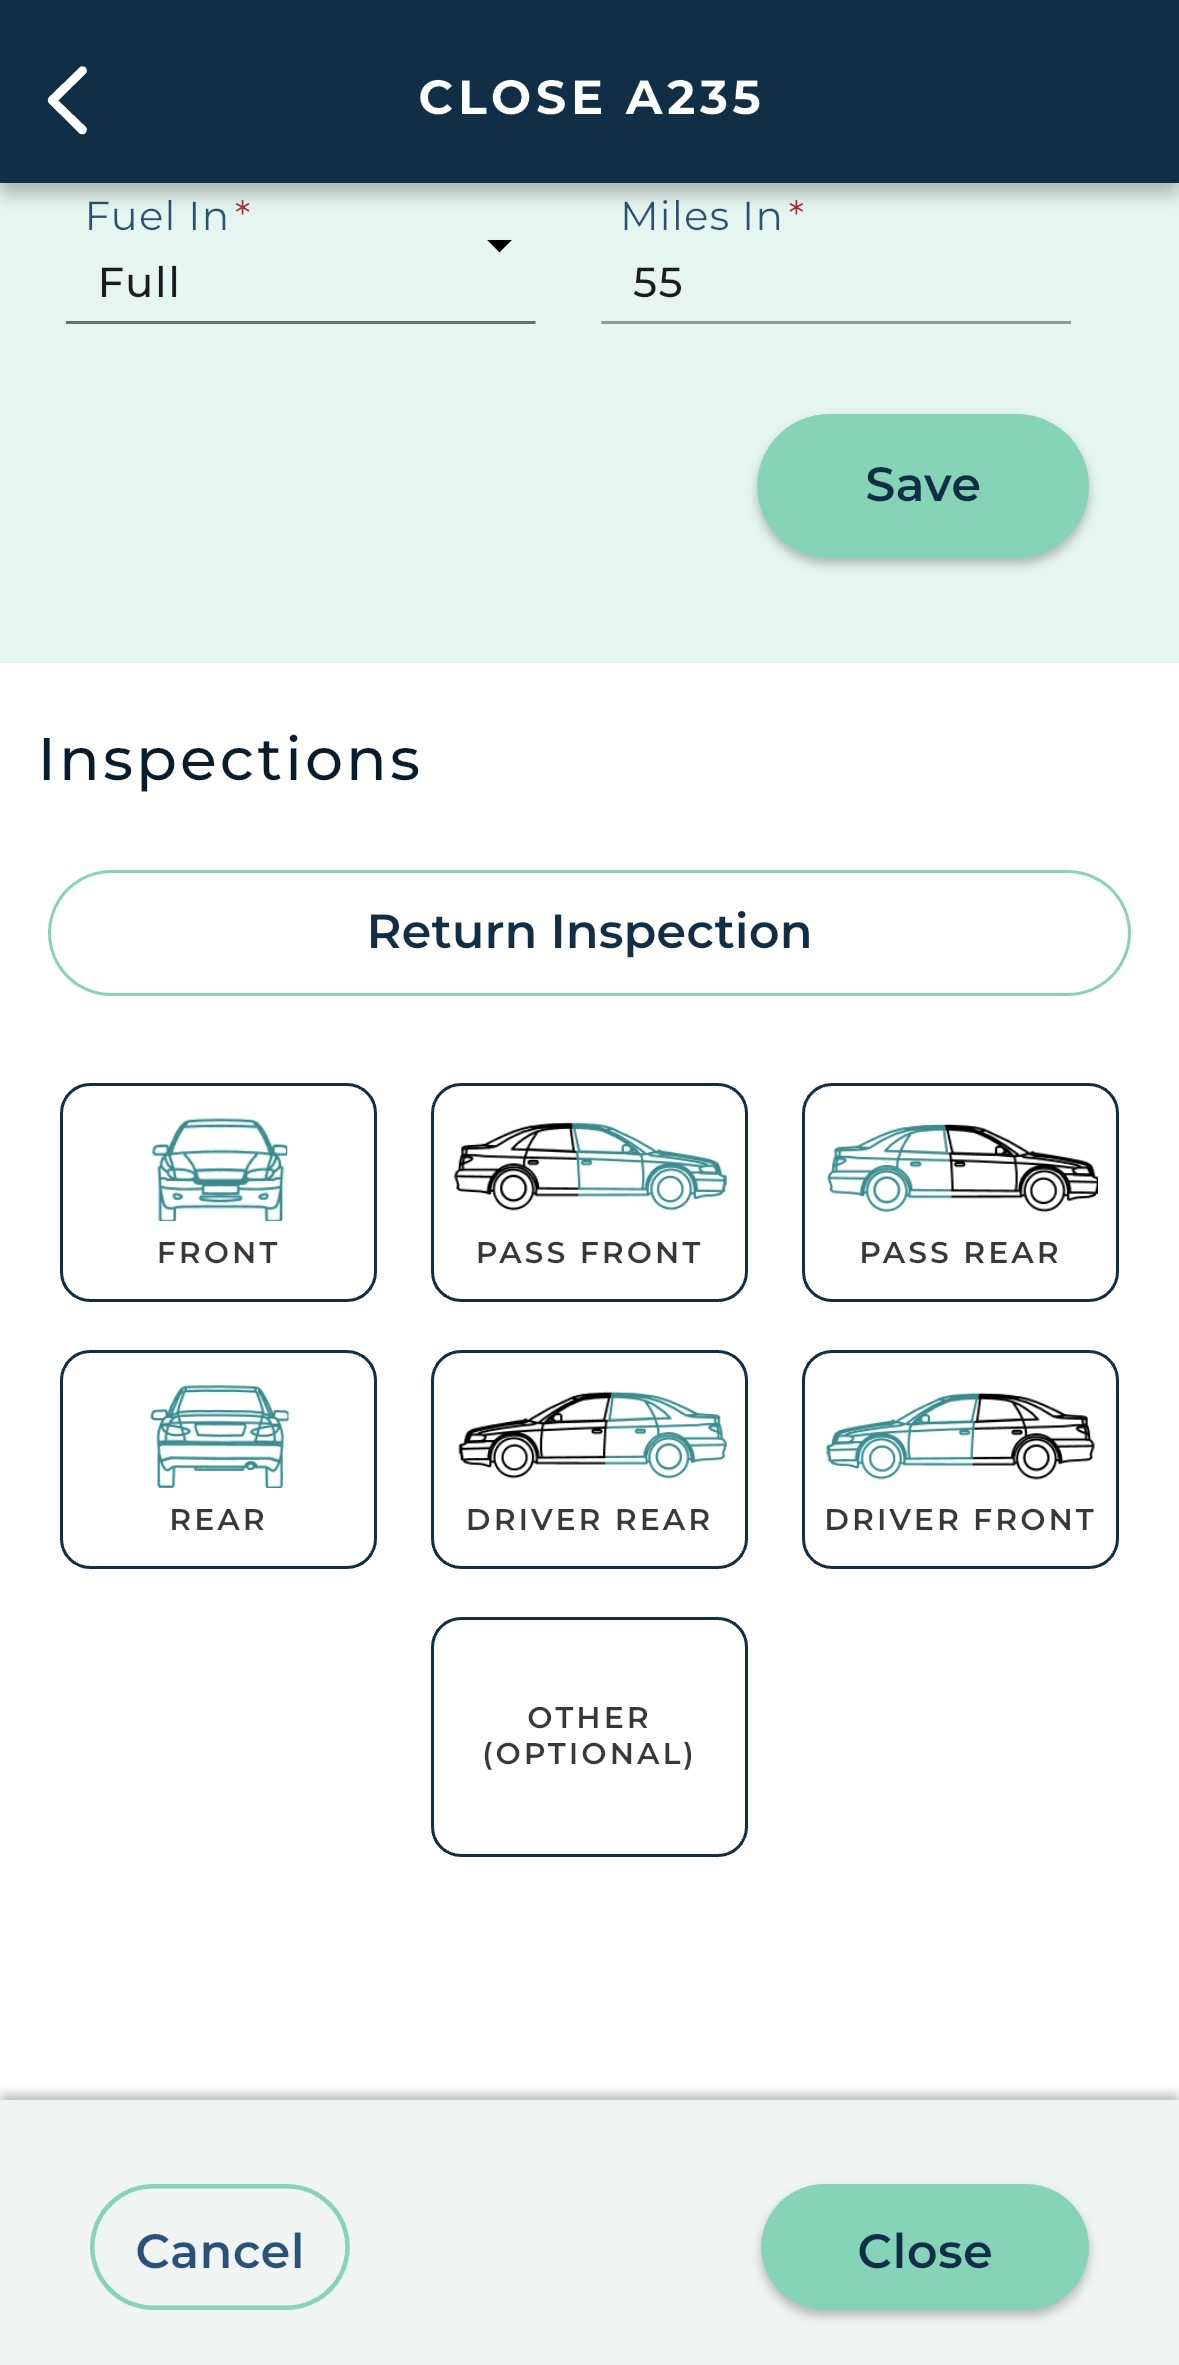
Tap Return Inspection to perform a return inspection of the unit and take photos and mark damage, as needed, for all listed zones of the vehicle.


Hover to view the full-sized image.

ClosedHow to perform an inspection

The availability of unit inspections on agreements is based on the Enable Agreement Inspection management setting.

During this inspection, you'll take up to three (3) photos and mark damage, as needed, for all listed zones of the vehicle: Front, Passenger Front, Passenger Rear, Rear, Driver Rear, Driver Front, and Other (i.e., the roof).

  1. Start your walkaround from the front of the vehicle.
  2. Aim your device's camera at the vehicle zone, and tap the Shutter button to take a photo. (If you need to retake the photo, tap Cancel and take it again.)
  3. Tap the Shutter button to take a photo.

  4. To note damage in the photo, tap MARK DAMAGE , and select the type of damage (e.g., dent, scratch, crack, or other).
  5. Mark damage, if needed.

  6. Tap Save. Both the photo and the damage entry, if noted, are saved.
  7. Repeat as needed, taking up to three (3) photos, total. (The number of photos saved for the zone is displayed in the upper right corner.)
  8. Tap or scroll to the next zone (e.g., Pass Front), and repeat the above for all listed zones, as required. (If inspections are required at your location, you must take at least one photo of each zone.)
  9. When finished inspecting the vehicle, tap Finish.

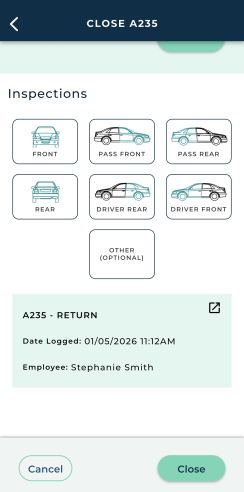
When you've finished the inspection and returned to the agreement, a summary of the checkout inspection is shown, including Date Logged and Employee who performed the inspection.

Inspection summary on the agreement.

Before you move on with this agreement, you can tap the Details icon () within the summary to review this inspection for each zone. When doing so, you can do the following:
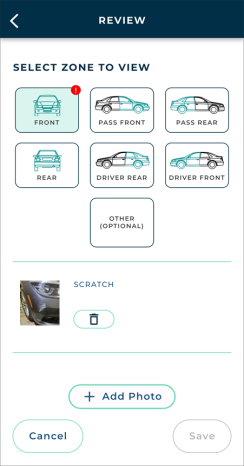
  • Tap a zone to view or delete photos. (Tap a thumbnail to view the full size.)
  • Tap + Add Photo to add a photo (up to three (3), total), and note additional damage, as needed.

If you make any changes when reviewing an inspection, tap Save.

Review inspection.

3. Close the Agreement

Once all information is filled out, tap Close.

The app displays a short confirmation and you are returned to your 'Home' screen.

Note: After closing an Internal Use agreement, the unit's status is returned to its previous status, regardless of the Unit Default Return Status management setting. (For example, if the unit had a status of Dirty before being assigned to the agreement, it is set to Dirty after the agreement is closed.)