
|
Navigation from your Home screen:
 >
>  Management
The Management tab of the Admin Hub contains settings that define the behavior of TSD DEALER. After you have configured your business structure on the Company tab, you must choose the specific group of management settings that affect each level of your business structure.
To view a tutorial for this topic from the web application, click the Tutorials icon ( ), or to view a list of available tutorials.
Using the Management Hub
The  icon next to a setting indicates it is at the location-level.
By default, setting are shown for your current location.
- Enter search criteria on the Management Hub. Type search criteria and press Enter or click .
- Use search filters to narrow results. Use the Categories search filter check boxes to narrow results by type of setting. (For example, to search for agreement-related settings, click the Agreements check box.) Use the Admin search filter to narrow results by dealership or location.
Note: A setting that is locked at a higher level in the business structure is displayed with a locked icon ( ) and cannot be edited.
- Next to the setting, click edit (
 ), if available.
 - Make your changes. See "Glossary of settings" in this topic for information on managing specific settings.
- (Optional.) At the dealer level, to prevent a setting from being edited by a location, select the Locked indicator (
 ).
). - Click .
Locking a setting prevents it from being edited by a lower level within your business hierarchy. For example, if a setting is locked at the dealer level, it is displayed with a locked icon () at the location level and cannot be edited by the location.
- Find and edit the management setting.
- Select the Locked indicator ().
- Click .
- Find and edit the management setting.
- Click to reset a management setting to its default setting.
- Click .
Key Setup Items
See "Setup Checklist" for a complete walkthrough of getting started setting up your system.
- Find and edit the Beginning of Day (Management setting) management setting and set the time of your location's beginning of day (e.g., 9:00 AM). Click .
- Find and edit the End of Day management setting and set the time of your location's end of day (e.g., 6:00 PM). Click .
Business sources can be tracked on appointments and agreements to help you maximize marketing and advertising efforts. A few business sources are set up for you and cannot be changed (Service RO, Warranty RO, and Other RO), but you can add and remove your own sources.
Your employee role must have the Manage Third Party Agreement Providers permission to add or edit third party providers. See "Roles & Permissions".
If your location uses a Third Party service where the customer is provided with a unit from a third party instead of from your fleet, you must set up third party providers before opening third party agreements.
Based on your management settings, certain information (e.g., insurance, repair order information, etc.) may be required in order to save an appointment and agreement.
Below is a list of settings you can use to manage required fields in TSD DEALER:
- Address information:
- Insurance information:
- Require Insurance Information
- Insurance Card Expiration Required
- Require New Insurance Information
- Require Axle Insurance Verification
- Require Canopy Insurance Verification.
- Repair Order information:
- Customer automobile information:
- Require Customer VIN
- Require 17-Character for the Customer VIN
- Require Customer VIN to Match OEM Make
- Customer Tag Number:
- Credit card information:
- Unit information:
If your location charges rates for loaner agreements or retail rates for rental agreements, as well as fuel charges, fees, and taxes, you can manage these settings on the Rates Hub. See "Rates, Charges, Fees & Taxes Setup"
Glossary of settings
Acceptable Performance
This setting may be managed by your manufacturer and unavailable for editing.
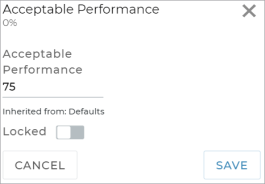
Use this setting to help meet fleet utilization performance goals by entering an "acceptable" minimum target for utilization over the lifetime of each unit. It's set to 0, by default, but you can enter a whole number to represent the target percentage (e.g., 75 for 75%).
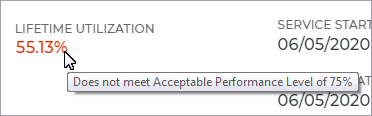
This activates color-coding through TSD DEALER, so you can view, at-a-glance, how units are performing in relation to this goal and take action, as necessary. If a unit's lifetime utilization meets the Acceptable Performance level, it will be color-coded green. If not, it will be color-coded red. Anytime you see a color-coded value, you can hover your cursor over the field to view a helpful tooltip with more information (e.g., "Utilization Meets the Acceptable Performance Level of 70%").
If a unit's lifetime utilization meets or exceeds the Acceptable Performance level, it will be color-coded green. If not, it will be color-coded red. You can hover your cursor over the value to view a helpful tooltip with more information.
A unit's Lifetime Utilization and associated Acceptable Performance color-coding can be found in the following areas of TSD DEALER:
- on the unit record: the Lifetime Utilization field.
- when assigning a unit to an open agreement.
- in reports, such as the Full Inventory Report (Lifetime Utilization column and Unit # column, on hover) and custom fleet reports
Hover to view the full-sized image.
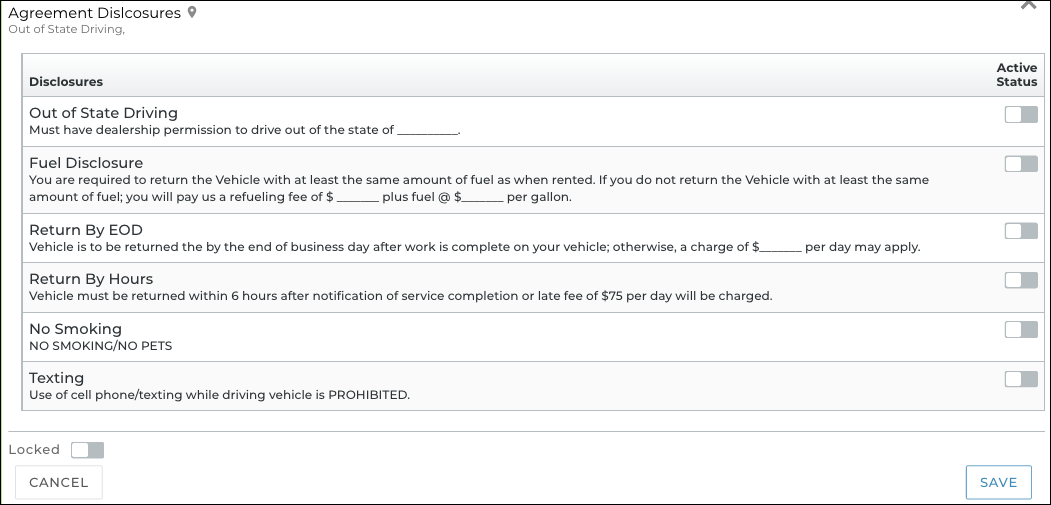
Agreement Disclosures
Note: Agreement Disclosures are only available on customized agreement forms. Contact the TSD Forms Department at support@tsdweb.com for information on how to customize your form.
If your locations' agreement forms been customized to include insurance-approved disclosures, you can use this setting to make those disclosures active at all locations.
So, for example, if you have a disclosure about mileage fees ("You are expected to pay [Mileage Charge] for driving over 200 miles"), you can toggle on this disclosure to make it active and display on your locations' agreement forms.
Hover to view the full-sized image.
Agreement Third Party Providers
Your employee role must have the Manage Third Party Agreement Providers permission to add or edit third party providers. See "Roles & Permissions".
If your location uses a Third Party service where the customer is provided with a unit from a third party instead of from your fleet, you must set up third party providers before opening third party agreements.
Agreement Address Required
Use this setting to make customer address information (Address Line 1, City, State, and Zip Code) required to complete the open agreement process. This also makes address information required on Expedited Appointments.
Agreement Emails
Use the Agreement Emails setting to turn on Default Opt Out Of Emails. When enabled, the Opt Out of Emails option is automatically selected for customers, by default, on new customer records, appointments, and agreements, going forward.
Note that the Opt Out Of Emails option is only available on agreements at locations that do not use Toll Processing, since an email address is required for Toll Processing.
Allow Add Vehicle Manually
For locations that do not use automated fleet import to add units to the fleet, this setting grants a location the ability to manually add a unit to the fleet via the New Unit screen.
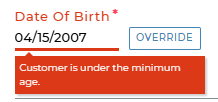
Allow override of customer Minimum Age on agreements
Your location's Customer Minimum Age management setting restricts customer (driver) age based on the Date of Birth, so you cannot add a customer to an agreement who is younger than the minimum age.
This additional setting may be used to make exceptions, so that employee roles with the Override Minimum Age Restriction permission can bypass this restriction via an button.
Allow Unit GPS Location
Connected Car integration is sold separately. Configuration must be performed by TSD Support. Contact your TSD Sales Representative at sales@tsdweb.com for more information.
When TSD Telematics (Connected Car Integration) is turned on for a location, this setting enables the GPS tracking component of the integration.
Auto Apply
The Auto Apply indicator, available within the Fees Setup management setting and turned off by default, determines whether a fee will be automatically applied in the Charges grid on new agreements.
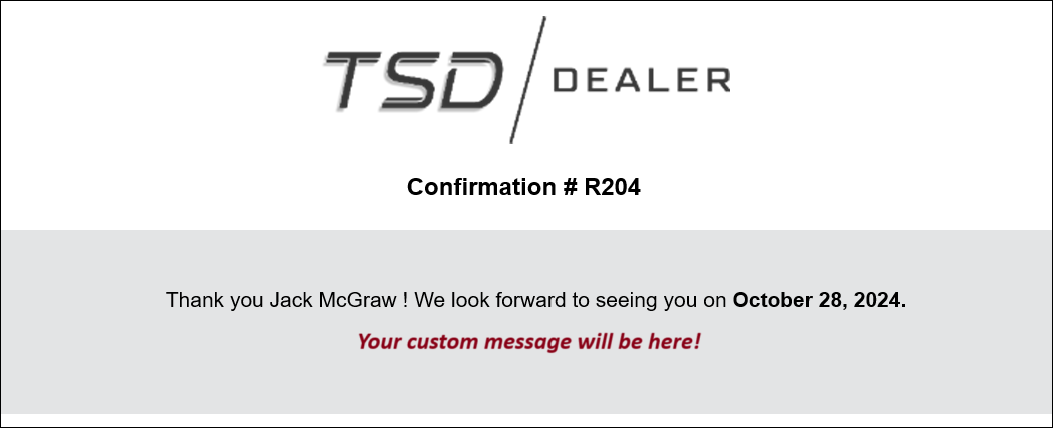
Appointments Confirmation Message
You must have automatic texting or emailing enabled for appointment confirmations within the Auto Texting and Emails setting to use this feature.
For locations that use Auto Text and Emails for appointment confirmations, the default email subject for appointment confirmations is:
[Your Location Name] Upcoming [Type] Appointment Appointment Number on Checkout Date and Time.
Example: TSD Motors Upcoming Rental Appointment (R204) on Oct 31 10:36 AM.
You can use this setting to enter a customized email subject (up to 80 characters) and add additional text to the body of the email or text (up to 400 characters), as shown below.
Hover to view the full-sized image.
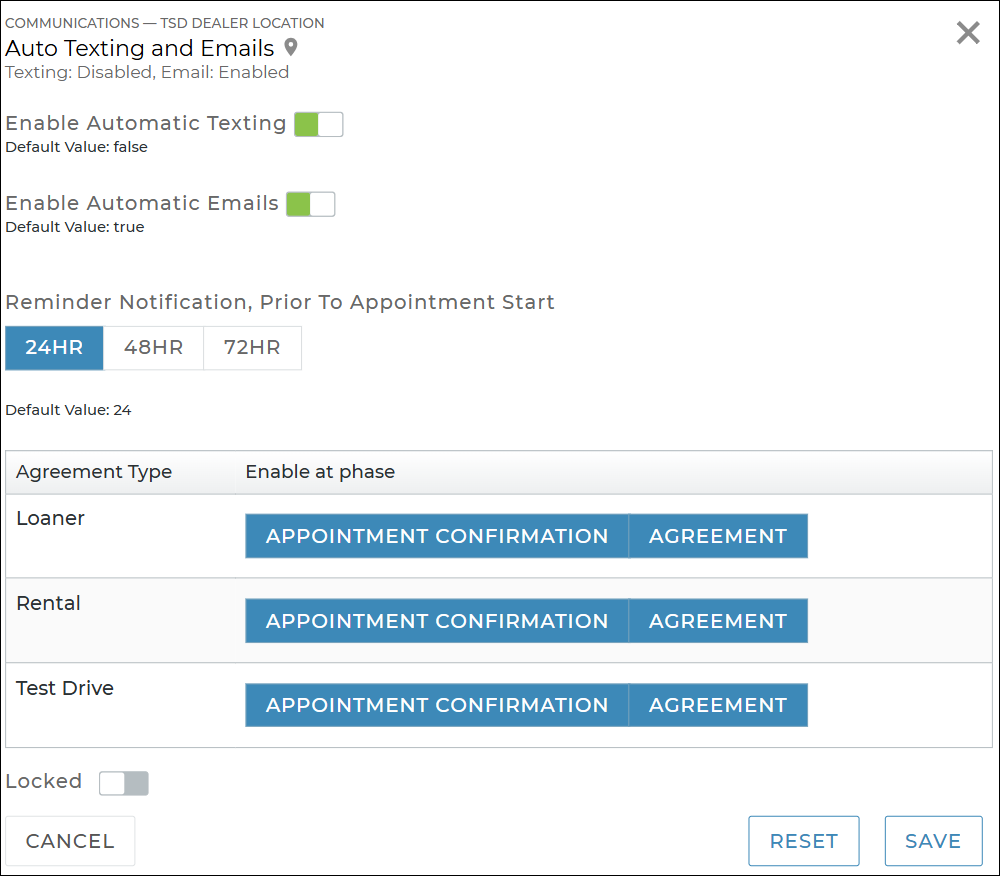
Auto Texting and Emails
Text messaging is available in the U.S. and Canada. For international texting, contact the TSD Sales Team by emailing sales@tsdweb.com.
Use this setting to turn on automatic texting and/or emailing on different types of appointments and agreements. See "Automatic Texting and Emailing" for more information, including additional setup options and how it works on appointments and agreements.
Hover to view the full-sized image.
Note: Any changes you make to this setting only affect new appointments and agreements, going forward, and do not affect texts or emails scheduled to be sent on existing appointments and agreements.
- Choose the method(s) of communication you want available. Toggle on Enable Automatic Texting for texts and/or Enable Automatic Emails for emails.
- Choose when the follow-up reminder message is sent. For appointment confirmations, an additional reminder text and/or email will be sent to the customer 24 hours (default), 48 hours, or 72 hours prior to the appointment's checkout date, based on your selection; the only exception is when an appointment is booked for later the same day.
- Choose when you want these messages triggered. The following options are available for each of your location's Agreement Types:
- Appointment Confirmation: Sent when a new appointment is created (booked).
- Agreement: Sent when an agreement is opened and closed. The message contains the signed or unsigned agreement form PDF as a link (in text) or attachment (in email).
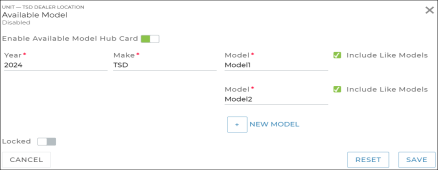
Available Model
Use this setting to highlight Ready models on your Fleet Operations Dashboard, so you'll see a status tile counting the number of Ready vehicles of that model.
Once you toggle on Enable Available Model Hub Card, enter the Year, Make, and name of the Model. If needed, click to add multiple model names for that model. (The first model listed will determine the actual name of the Dashboard hub card.)
Additionally, you can click the Include Like Models check box to have the system include in the count units like the model name, instead of the name exactly as entered. So, if you've set up a model named TSD-9 as an available model, instead of only including models named 'TSD-9', it would search for units like 'TSD-9% and include models named TSD-9, TSD-90, etc.
Available Repair Business Sources
Use the Available Repair Business Sources setting to manage business sources that can be tracked on appointments and agreements to help maximize marketing and advertising efforts. A few business sources are set up for you and cannot be changed (Service RO, Warranty RO, and Other RO), but you can add and remove your own sources.
Locations using TSD's Delivery and Collection module have a Delivery & Collection source available, and it is automatically selected by default as the Business Source whenever you mark an appointment or agreement for Delivery and/or Collection (therefore overriding your default Business Source selection). See "Delivery and Collection with TSD" for more information.
Available Unit Statuses
Use this setting to determine the unit statuses that you want the system to still consider "available" for assignment to appointments, agreements, and exchanges.
For example, if you want units that are On Maintenance to still be available for use on appointments and agreements, then add On Maintenance as an Available Unit Status.
Beginning of Day
Set the time of your location's beginning of day (for example: 09:00 AM). This affects the times available for selection when setting an appointment or agreement's Checkout and Return Date.
Categories search filter
Categories search filters are available on the Management Hub for you to locate specific types of settings, such as agreement-related settings. For example, select the General category to view privacy and security settings, return policies, and more.
Country Code, e.g. "US"
Your Country Code (such as US).
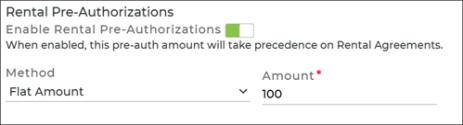
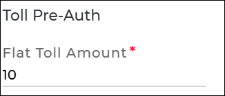
Credit Card Required at Open and Pre-Authorization Settings
Note: This setting is only available at the dealer-level, for locations with Credit Card Processing for agreements and/or tolls. When searching for this setting, make sure you've selected a dealer check box on the left panel, and not just a location check box.
For systems with integrated Credit Card Processing, this setting helps you manage key components of charging and payments, such as requiring a credit card be captured and configuring pre-authorization holds on captured credit cards.
- Make a credit card required on every new agreement, so one is always on file for potential charges.
 Read more:
 - Turn on pre-authorizations to hold funds for potential charges. Read more:
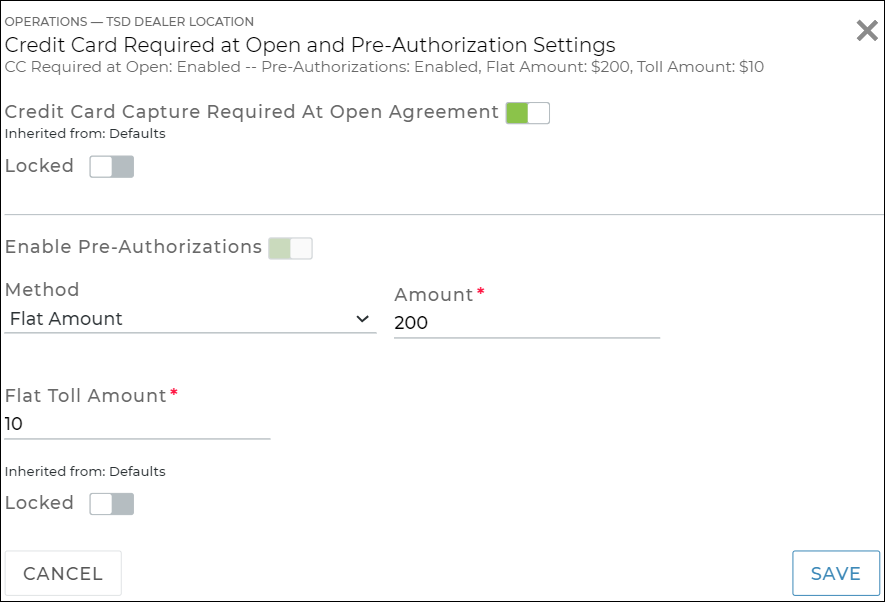
Hover to view the full-sized image.
Customer Minimum Age
The minimum age required for an appointment or agreement to be created for a customer, based on the date of birth on the customer's driver's license.
Overriding this restriction on appointments and agreements: If the current location has the Allow Override of Customer Minimum Age on Agreements management setting turned on, employee roles with the Override Minimum Age Restriction permission can click to bypass the customer minimum age requirement.
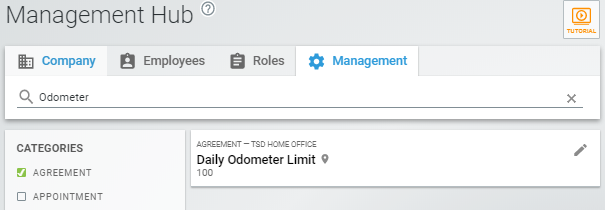
Daily Odometer Limit
Use this setting to limit accidental entry of excess mileage due to mistyped odometer readings. When an agreement is returned, if the number of miles per day exceeds this amount, an alert is displayed to prompt the employee to double-check the mileage reading.
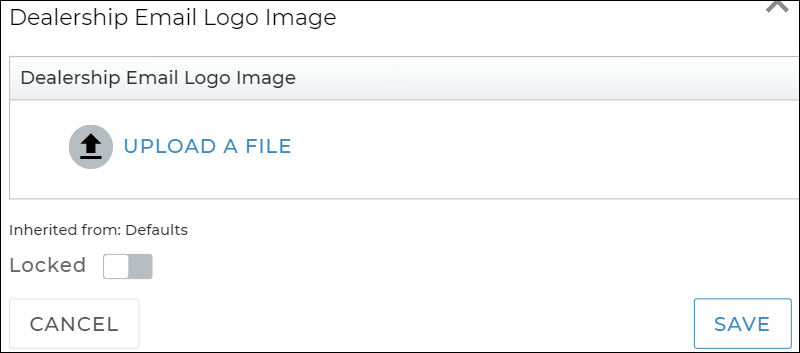
Dealership Email Logo Image
For locations using the Expedited Appointments feature, use this setting to reinforce your brand identity for customers by uploading a logo (jpe, jpg, jpeg, or png) to displayed at the top of your expedited appointment emails. See "Expedited Appointments" for more information.
Dealer Turnback Days
This setting is not displayed if your manufacturer does not allow dealers to edit Turnback Date.
This setting determines a unit's Turnback Date when it is added to the fleet. For example, if you enter 365, then when a unit is added, either manually or via automated fleet import, its Turnback Date is set to 365 days after the Service Start Date.
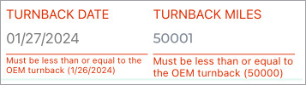
Note: Separate settings for determining default Turnback Date and Turnback Miles may be managed by your manufacturer at the OEM level. If so, then restrictions may be in place when it comes to managing Turnback settings and editing Turnback fields.
Depending on your manufacturer, you may not be allowed to manage Turnback Date settings or edit Turnback Dates at all, regardless of your permissions. See "Dealer Restrictions for Turnback Date & Turnback Miles" below for more information about restrictions.
Dealer Turnback Miles
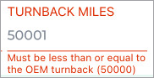
This setting determines a unit's Turnback Miles when it is added or imported to the fleet. For example, if you enter 100,000, then when a unit is added to the fleet, either manually or via automated fleet import, its Turnback Miles are set to 100,000 miles.
Note: Separate settings for determining default Turnback Date and Turnback Miles may be managed by your manufacturer at the OEM level. If so, then restrictions may be in place when it comes to managing Turnback settings and editing Turnback fields.
Depending on your manufacturer, you may not be allowed to manage Turnback Date settings or edit Turnback Dates at all, regardless of your permissions. See "Dealer Restrictions for Turnback Date & Turnback Miles" below for more information about restrictions.
Default Business Source
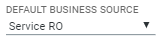
This list, displayed within the Available Repair Business Sources management setting at the location level, allows you to choose a business source to be selected by default on the location's appointments and agreements. See "Manage business sources" for more information.
Default Return Time
Set the default return time for new appointments and agreements longer than a day (that is, when the Checkout and Return Dates are more than 24 hours from each other).
An agreement opened from an appointment retains the appointment's original duration and return time.
Note: This setting can be overridden by the Default Same Day Return Time setting.
Default Same Day Return Time
Override the Default Return Time setting for instances in which new appointments and agreements are returned within the same day. Leave this setting as EOD (End of Day) or enter a specific default Return Time.
Delivery and Collection
TSD DEALER's Delivery and Collection integration helps you meet your customers' needs by bringing your dealership to their driveway, facilitating a process of delivering a unit and picking up a customer's vehicle for service, then collecting the loaner unit when the repair is complete.
The Delivery and Collection setting is used to manage your Delivery and Collection integration, whether that's with a partner and a third party driver app component, or without a partner.
- With a partner: The integration with a partner offers an array of features to facilitate a quick and efficient delivery and collection program with a third party driver app. If you prefer to use a third party driver app component, a partner integration is required; contact the TSD Sales Team by emailing sales@tsdweb.com.
- Without a partner: As long as your system is not already set up with an integration with a provider, you can toggle on the No Partner Delivery and Collection option. This integration without a partner offers an array of features to facilitate a quick and efficient delivery and collection program, including adding delivery and collection addresses to appointments and agreements, tracking these records in the system, and more.
Disable GPS Tracking by Agreement Types
This setting is only applicable for locations with TSD Telematics. TSD Telematics is sold separately. Configuration must be performed by TSD Support. Contact your TSD Sales Representative at sales@tsdweb.com for more information.
For locations with TSD Telematics, the Disable GPS Tracking by Agreement Types management setting identifies the list of states in which GPS location tracking can be restricted while out on certain types of agreements.
Within the setting, you can turn on the Disable Unit GPS Location toggle and select the types of agreements for which you want to restrict vehicle tracking in those states: Loaner, Rental, Internal Use, and/or Shuttle agreements.
![]()
![]()
For example, if California is listed as a restricted state, and tracking is disabled on Rental and Loaner agreements, then you cannot view units on a map while they are In Use on new Rental and Loaner agreements created at California locations, going forward. A message will be displayed upon clicking the button on the agreement: "Tracking is restricted for this unit."
Display Dashboard
When enabled, the Operations and Performance dashboard shows by default on the Home page upon an employee's first log-in at the location.
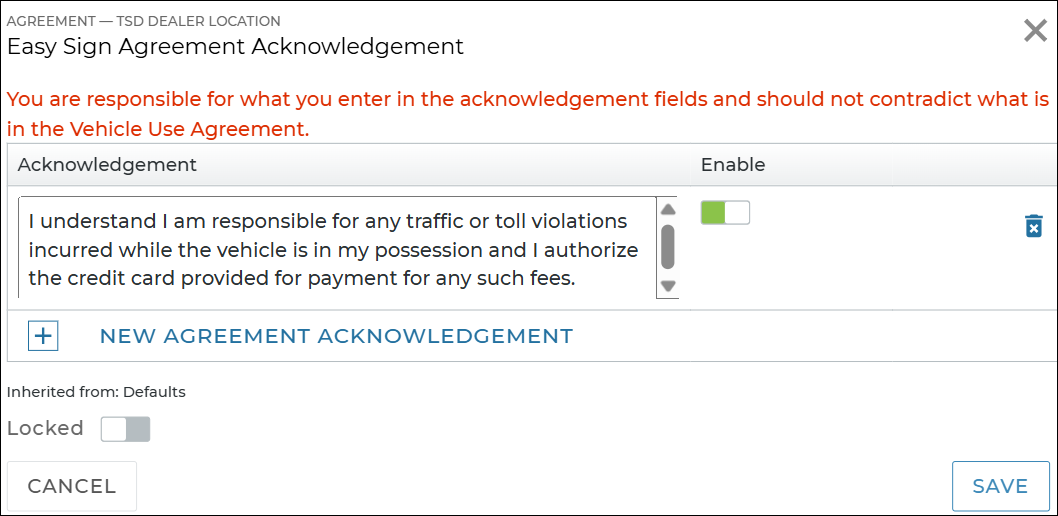
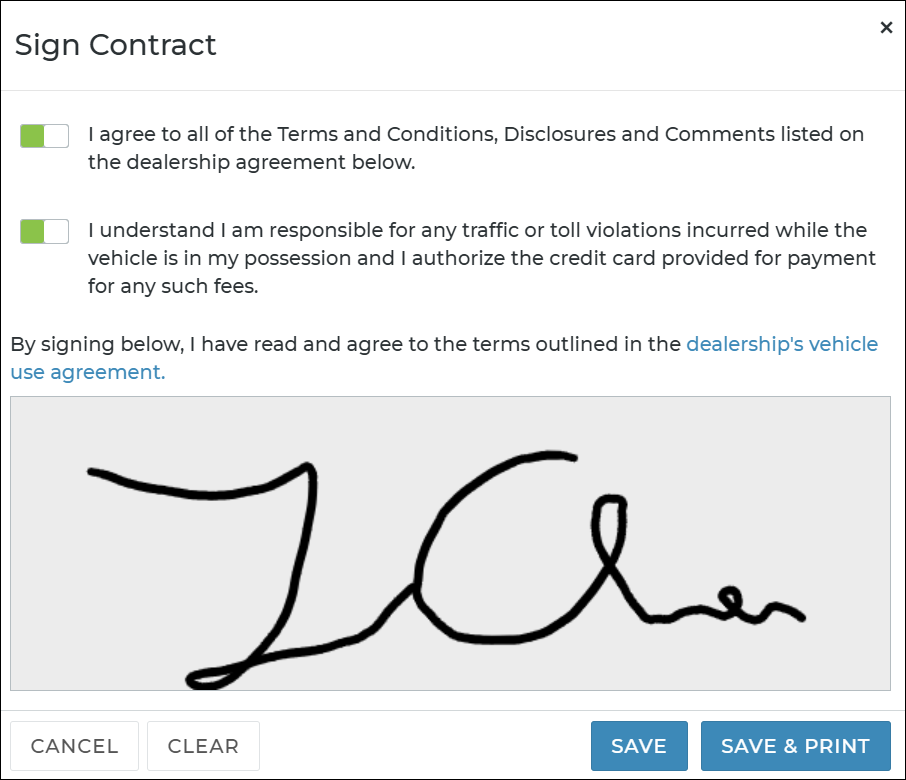
Easy Sign Agreement Acknowledgement
This setting is only applicable for easy customer signatures (i.e., easy sign).
You can add up to five (5) additional toggles for customers to acknowledge during the Easy Sign process, in addition to the other general agreement to terms and conditions.
Note: Acknowledgments may be added, or replaced and locked by your manufacturer or auto group, if applicable, or by TSD. Acknowledgments added by your manufacturer will be at the top of the list, with those added by your auto group below that, if applicable.
- Click .
- Enter your text, up to 500 characters.
- Toggle on Enable (
 ) to mark it as active, so it displays on the Easy Sign "Sign Contract" dialog.
 - Click .
Hover to view the full-sized image.
Hover to view the full-sized image.
You can view which acknowledgements were toggled by the customer on a given agreement via the View Acknowledgements link within the Agreement Files section of an agreement. (This is for reference only; the toggles cannot be updated.)

Employee Minimum Age
The minimum age required for an employee record to be created.
Enable Agreement Inspection
Turn on this setting if you want to perform unit inspections on your fleet during the open and close agreement process, as well as when viewing an agreement, for the unit currently In Use. For transparency’s sake, a damage diagram is included on the customer’s printed or emailed agreement form.
Enable Close Pending Agreements
Enabled for new locations by default, this setting turns on the Close Pend feature, which can be performed during the close or quick return process.
Close Pending an agreement prevents any further charges from accruing and returns the unit to its default return status, based on the Unit Default Return Status setting. You can find agreements with the Close Pend status using the search filter check box on the Agreement Hub, on the agreement Operations dashboard.
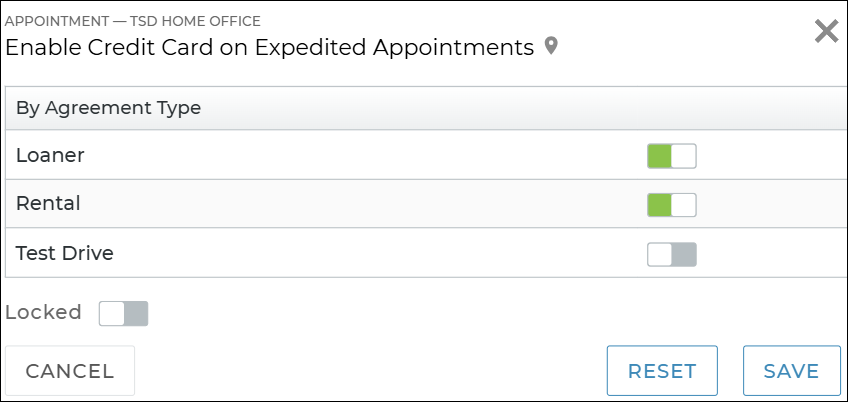
Enable Credit Card on Expedited Appointments
This setting is only available for editing at locations using integrated Credit Card Processing, and applicable for locations using Expedited Appointments. It is turned on, by default.
If you use a Credit Card Processing integration, use this setting to choose whether customers have the option to add a credit card on the Expedited Appointment form, for different types of appointments (e.g., Loaner, Rental, Test Drive).
Hover to view the full-sized image.
When toggled on for an Agreement Type (e.g., Loaner, Rental, Test Drive), the Credit Card Details section and corresponding button are available on the Expedited Appointment. When toggled off, this section is not displayed, and the customer cannot provide payment information when submitting their appointment.
Enable Open Pending Agreements
Turn on this setting if you want a (web) or OPEN PEND (mobile) button to be available when opening new agreements to postpone assigning the unit until later and save the agreement with a Unit Pending status (or an Incomplete status, if a Return Date wasn't selected).
Enable Warnings for Units Missing Transponder ID
Toll Processing is a component of the TSD Connect integration. Location configuration must be performed by TSD Support. Contact your TSD Sales Representative at sales@tsdweb.com for more information to get started.
If your location uses Toll Processing with transponders (with Verra Mobility), it is required that accurate Transponder IDs be associated with each VIN in your fleet. Use this setting to display an “Active W/O Transponder” tile on your Fleet Operations dashboard, as well as messages on the unit record if the Transponder ID isn’t filled in: "Unit does not have a Transponder ID, Tolls accrued will be paid by plate." See "TSD Toll Connect: Toll Processing" for more information.
End of Day
Set the time of your location's end of day (e.g., 06:00 PM). This affects the times available for selection when setting an appointment or agreement's Checkout and Return Date.
On appointments and agreements where the Checkout and Return Dates are on the same day, the time of the Return Date defaults to your location's end of day.
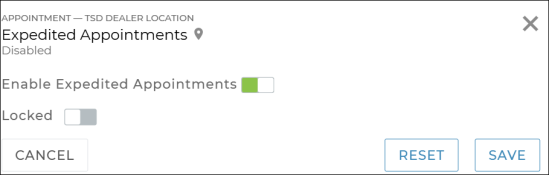
Expedited Appointments
You must have automatic texting or emailing enabled for appointment confirmations within the Auto Texting and Emails setting to use this feature.
Turn on the Expedited Appointments feature, so customers can speed up their experience by remotely accessing their appointments via a link within their appointment confirmation email or text message, and submit their information in advance.
Fuel Capacity Unit
Use this setting to set the unit of measurement by which every unit's fuel capacity (fuel tank) is measured: Liters or Gallons.
Fuel Input Unit
Use this setting to determine the unit of measurement for a unit's fuel level: eighths or sixteenths.
Note: (For locations that manually add vehicles only) For electric vehicles, based on the Fuel Type, this field is not displayed, since it is not applicable.
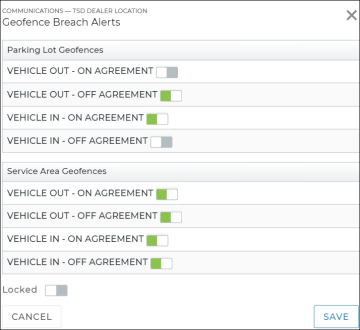
Geofence Breach Alerts
This setting is only applicable for locations using TSD Telematics integration with the Telematics Hub. See "TSD Telematics" for more information.
Important Note: This setting is not available unless the Alerts Hub management setting has Geofence Breaches types of alerts turned on.
TSD Telematics integration with the Telematics Hub offers geofencing capabilities to let you set geographic virtual boundaries, or geofences, around an area so you can be alerted when vehicles leave your parking lot or otherwise designated service area.
After you've used the Alerts Hub management setting to turn on Geofence Breach alerts, you can use this Geofence Breach Alerts setting to toggle on the types of geofence breach alerts you want to receive for units entering (VEHICLE IN) or leaving (VEHICLE OUT) these geofences when being assigned to an agreement or returning from an agreement.
For example, you may want the "VEHICLE OUT - OFF AGREEMENT" alert turned on for your parking lot geofences, as a unit shouldn't be leaving the lot when it returns from an agreement.
iFrame Assets
This setting is related to the TSD Web Scheduler for online booking, which is sold separately. Contact your TSD Sales Representative at sales@tsdweb.com for more information.
This setting may be managed by your manufacturer and unavailable for editing (locked).
With the TSD Web Scheduler, you have the option of customizing the Vehicle tab of the Scheduler iFrame embedded on your website by displaying names, images, and slogans for your Model Groups.
To add model names, images, and descriptions:
You can remove a model any time using the button.
- Within the setting, click .
- Enter the name of the Model Group.
- Add a description.
- Click to upload a photo.
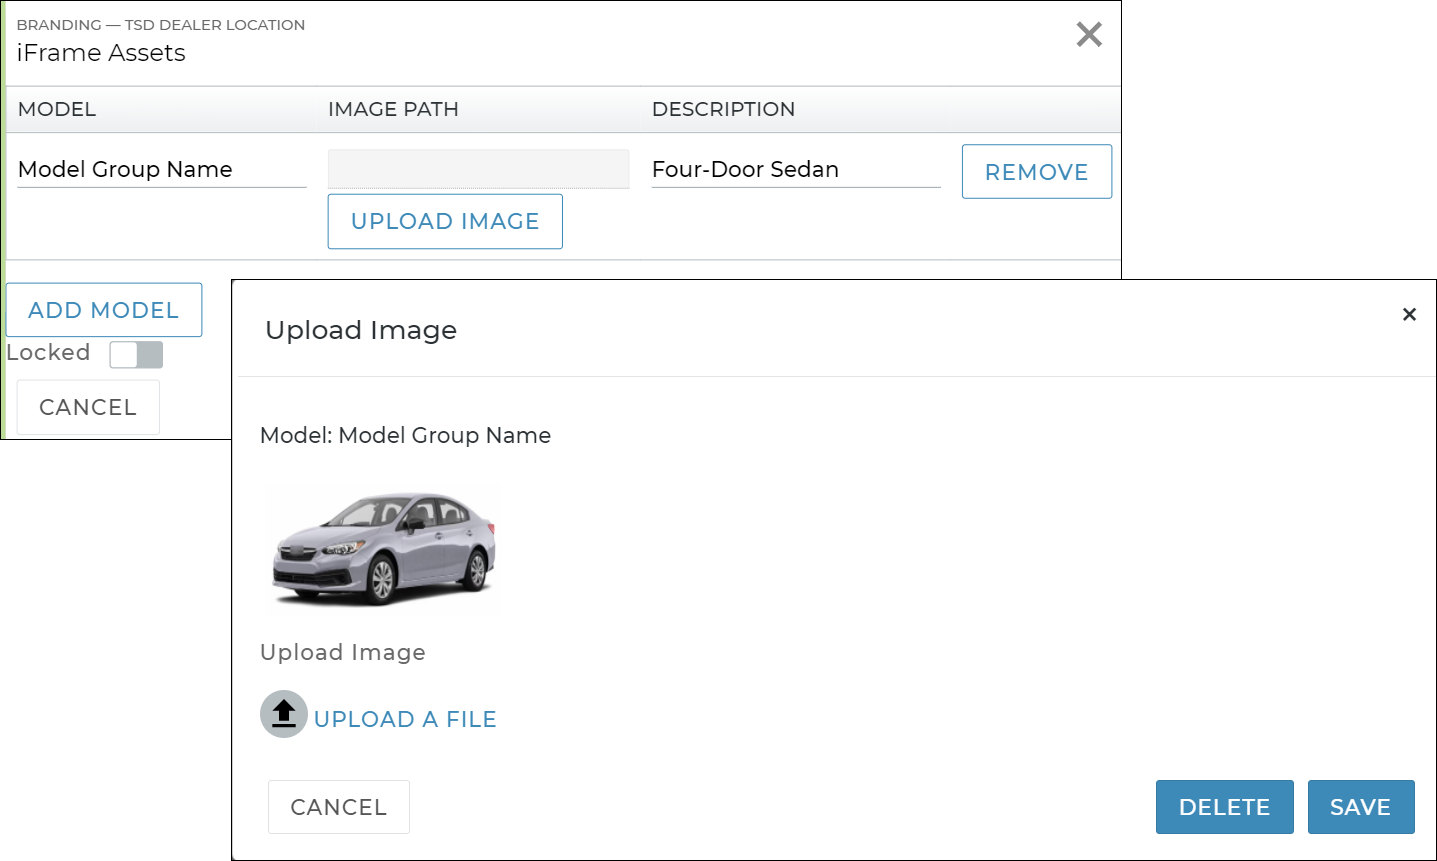
Hover to view the full-sized image.
Insurance Card Expiration Required
Turn on this setting to make an Expiration Date field required when uploading a photo of an insurance card to an appointment or agreement. When the setting is turned off, you can still choose to enter an Expiration Date for the insurance card photo, but the field is optional.

Loaner Labor Operation ID
Enter the Labor Operation ID that identifies a loaner unit.
Lock Service Start Date
Turn on this setting to lock a unit's Service Start Date so that it is unavailable for editing (for example, for OEMs that provide this information during the automated fleet import process). When this setting is turned off, the Service Start Date will be automatically set, by default, to the unit record's Date Added, or the date the unit is added to fleet.
Maximum Maintenance Odometer Reading Increment
If you use Maintenance Intervals for your fleet, use this setting to enter the maximum number of miles you can schedule as an Interval.
Maintenance Intervals
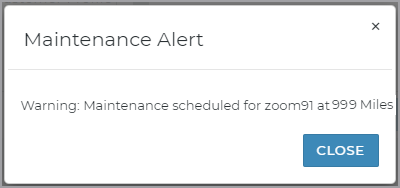
You may want all units in your fleet to have an oil change every 3,000 miles, or to be inspected every 12 months. In this case, use the Maintenance Intervals management setting to schedule maintenance intervals so that you can be alerted when a unit reaches a set interval and needs maintenance.
See "Unit Maintenance" for information on tracking units that need maintenance, viewing and resetting scheduled maintenance, maintenance alerts, and more.
![]() What happens when a unit reaches a maintenance interval?
What happens when a unit reaches a maintenance interval?
Maximum Days for an Agreement
Set the maximum length, in days, the system will allow for any agreement or appointment.
Maximum Drivers
Maximum number of additional drivers on an agreement, including on the mobile app. When this is exceeded, the followed message is displayed under Additional Drivers: "The maximum number of drivers for the agreement has been reached."
Number of Days in advance to warn about License Plate or Inspection Sticker expiration
The number of days before a license or inspection sticker is set to expire that you want the system to display an alert. This alert will display when opening or closing an agreement (including exchanges) if a unit fails to meet this criteria before the agreement's expected return.
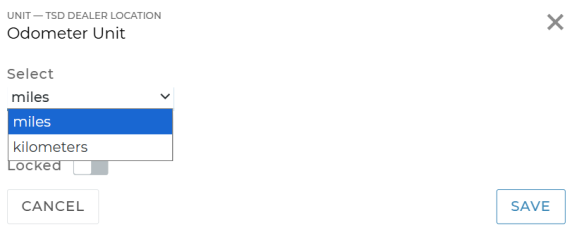
Odometer Unit
Set the default odometer unit of measurement for new units, going forward: Miles or Kilometers. (You can always change this when adding new units.)
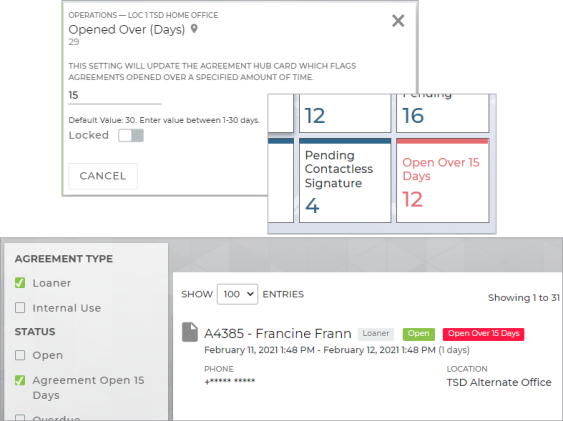
Opened Over (Days)
Use this setting to track agreements opened for a certain number of days.
Specifically, this updates the "Open Over 30 Days" status tile on the Agreement Operations dashboard, as well as the Agreement Open 30 Days status search filter on the Agreement Hub, to your specified number of days. It also determines which agreements are included in the Opened Over (Days) alerts, if set up.
For example, if you want to track agreements opened over 15 days, change the setting from 30 (the default) to 15.
Report Card Emails
This setting is only available for employees with a High role. See "Roles & Permissions" for more information.
TSD DEALER is offers an automated weekly Report Card, so managers can review a location's Key Performance Indicators (KPIs) without having to log into the application. See "Report Card for Dealers" for more information.
If you want to have this report sent out as an email attachment, use this setting to toggle on the employees you want to receive this report.
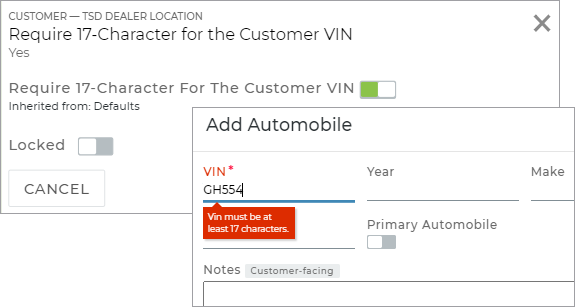
Require 17-Character for the Customer VIN
Use this setting to make the customer VIN field only accept 17 characters when adding a customer automobile on a customer record, appointment, and agreement.
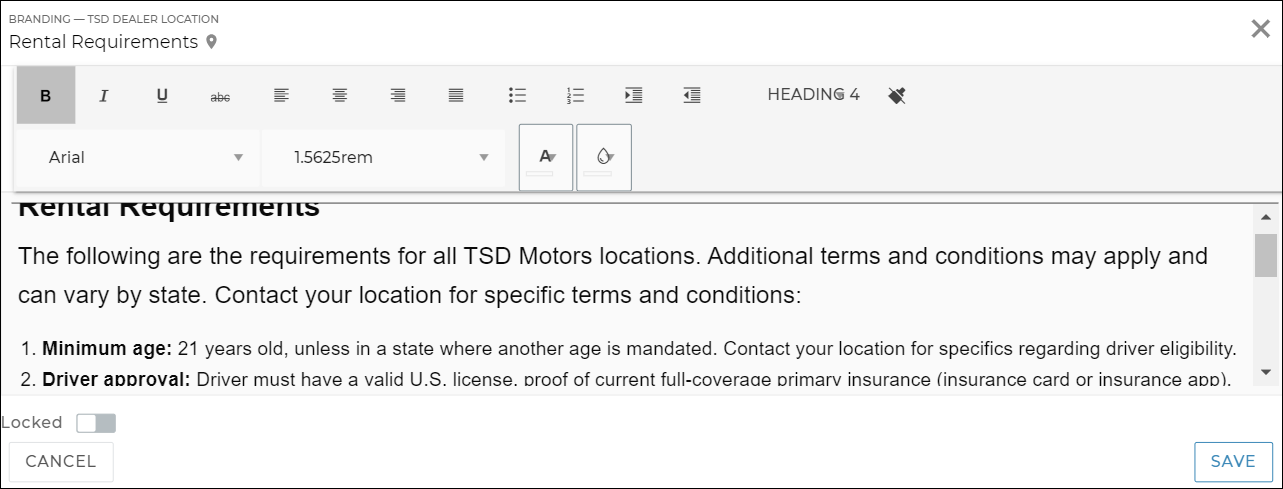
Rental Requirements
The TSD Web Scheduler for online booking is sold separately. Contact your TSD Sales Representative at sales@tsdweb.com for more information.
This setting may be managed by your manufacturer and unavailable for editing (locked).
With the TSD Web Scheduler, which integrates with your website to optimize your online booking process, you have the option of making your location's requirements and disclaimers for rentals available to your customers.
For example, you might include things like minimum age, a driver's license, and proof of insurance, as well as key disclaimers such as pet and smoking regulations, mileage limits, and more.
You can customize the style and format of this text, including the font, size, alignment, colors, and more.
Hover to view the full-sized image.
These requirements are accessible via a View Rental Requirements link on the Review tab of the Scheduler.

Hover to view the full-sized image.
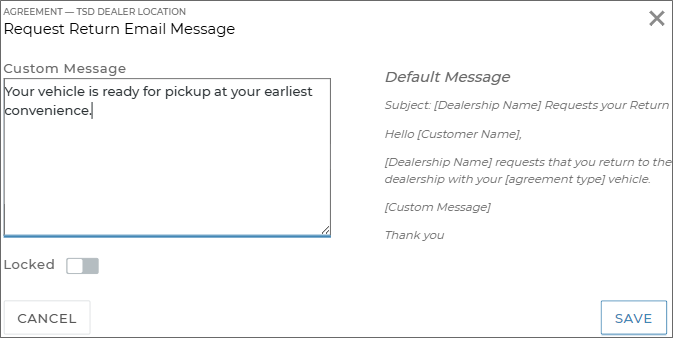
Request Return Email Message
Use this setting to add custom text to the body of the email sent via the Request Return button on an agreement, for requesting the customer to return the unit. The default email template is shown next to the setting:
Subject: [Location Name] Requests your Return
Body: Hello [Customer Name], [Location Name] requests that you return to the dealership with your [agreement type] vehicle.
Custom Message (if configured)
Thank you
Require Axle Insurance Verification
This setting is only applicable for locations with Axle Insurance integration. Contact your TSD Sales Representative at sales@tsdweb.com for more information.
If you use Insurance Verification Integration with Axle to automate the process of capturing and verifying a customer's automobile insurance policy, you can use this setting to make connecting an insurance policy through Axle required to open agreements. (Only applicable for new agreements, going forward.)
Note: Employee roles with the Allow Override Insurance Verification permission can override this requirement on the agreement via an button.
Require Canopy Insurance Verification
This setting is only applicable for locations with Insurance verification integration with Canopy. Contact your TSD Sales Representative at sales@tsdweb.com for more information.
If you use Insurance Verification Integration with Canopy to automate the process of capturing and verifying a customer's automobile insurance policy, you can use this setting to make connecting an insurance policy through Canopy required to open agreements. (Only applicable for new agreements, going forward.)
Note: Employee roles with the Allow Override Insurance Verification permission can override this requirement on the agreement via an button.
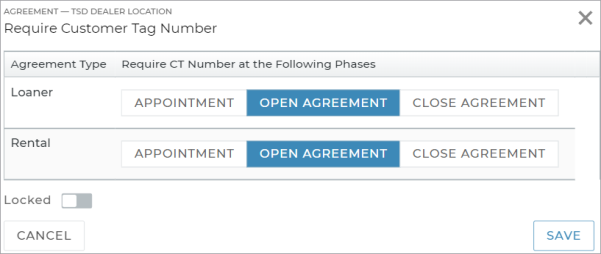
Require Customer Tag Number
Use this setting to make the Customer Tag Number field required to complete different types of appointments, open agreements (web and mobile), and/or close agreements (web and mobile). You can do this for Loaner and Rental appointments and agreements, depending on the types made available for the location.
To make Customer Tag Number required:
- on new appointments: click .
- at open agreement: click . This includes agreements in which a Third Party unit is assigned. See "Third Party Agreements" for more information.
- at close agreement: click .
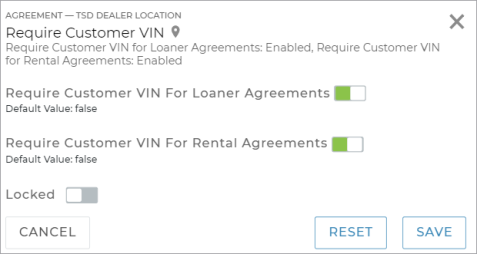
Require Customer VIN
Use this setting to make a customer automobile, including its VIN, required to complete the open agreement process for Loaners or Rentals, based on agreement types in use at your location.
- To make a customer automobile required:
- on a Loaner agreement: Toggle on Require Customer VIN For Loaner Agreements.
- on a Rental agreement: Toggle on Require Customer VIN For Rental Agreements.
- Click .
Require Insurance Information
Use this setting to make customer insurance information required to complete the open agreement process, as well as on expedited appointments accessible by customers via TSD DEALER's Expedited Appointments feature.
To meet this requirement, you can fill in the required insurance fields, upload a photo of the insurance card, or both.
This setting is one of three that help manage how insurance information is handled: Require Insurance Information (this setting) Insurance Card Expiration Required, and Require New Insurance Information. None of these settings apply to the Full Insurance Coverage field, which is displayed and always required for some locations depending on your manufacturer.
Note: When the Insurance Card Expiration Required management setting is also turned on, an Expiration Date must be filled in when uploading a photo of the insurance card on an appointment or agreement (web or mobile).
Require New Insurance Information
Use this setting if you want existing customer insurance information, including insurance card photos, to be cleared on every new web and mobile agreement going forward. That way, you can add the most updated insurance information on every new agreement.
Note: This setting does not make insurance information required to complete an agreement; the Require Insurance Information setting can be used to make insurance information mandatory.
Note that this does not remove customer insurance information saved to the customer's record; it just doesn't carry over onto new agreements.
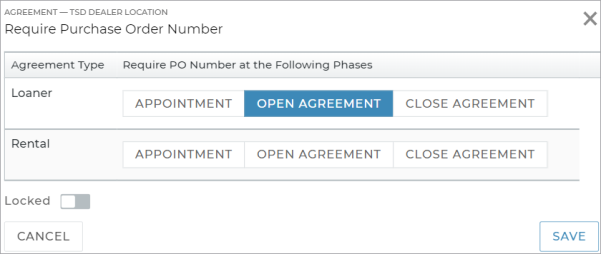
Require Purchase Order Number
Use this setting to make the Purchase Order Number field required to complete different types of appointments, open agreements (web and mobile), and/or close agreements (web and mobile).
To make Purchase Order Number required:
- on new appointments: click .
- at open agreement: click . This includes agreements in which a Third Party unit is assigned. See "Third Party Agreements" for more information.
- at close agreement: click .
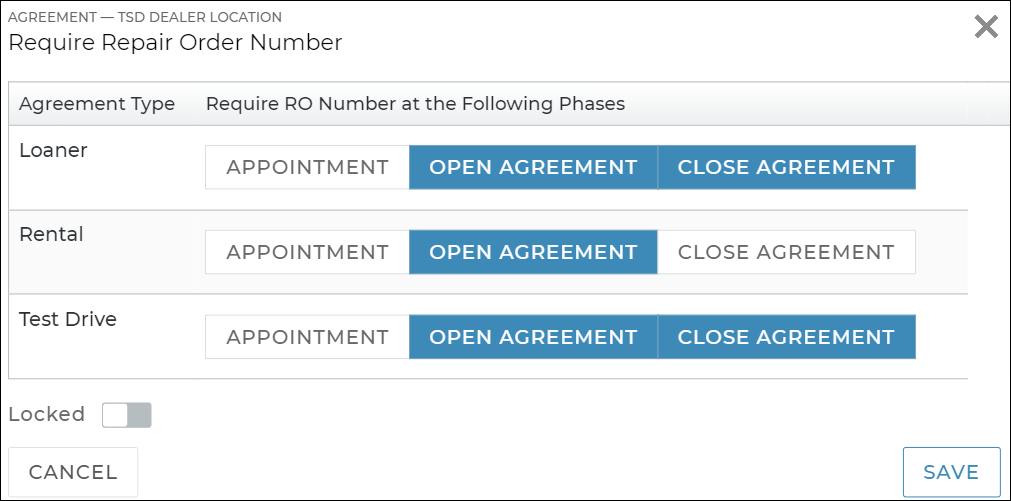
Require Repair Order Number
Use this setting to make the Repair Order Number field required to complete different types of appointments and agreements (Loaner, Rental, and/or Test Drive, based on the Agreement Types in use at your location).
- To make Repair Order Number required:
- on an appointment: click .
- at open agreement: click .
- at close agreement: click .
- Click .
Hover to view the full-sized image.
Require Unit Inspection
Use this setting to make the inspection of a unit mandatory on different types of agreements, at open and/or close agreement (which includes close pend)
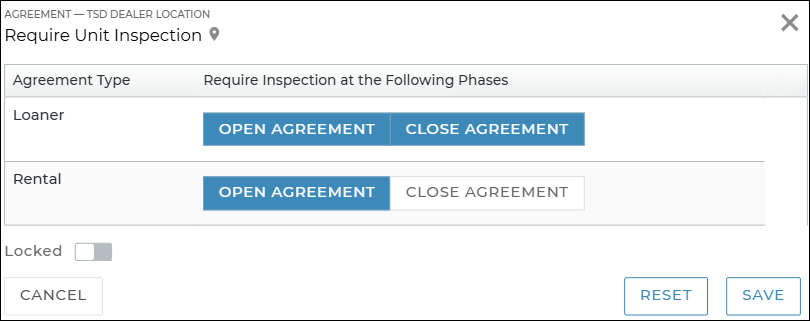
Hover to view the full-sized image.
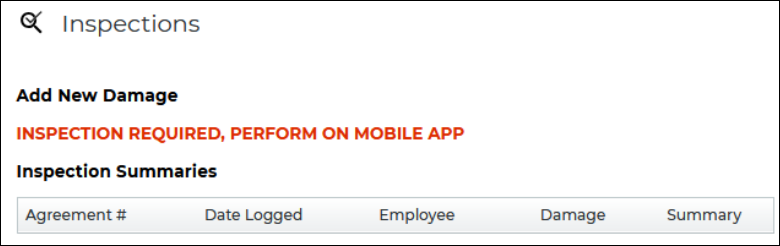
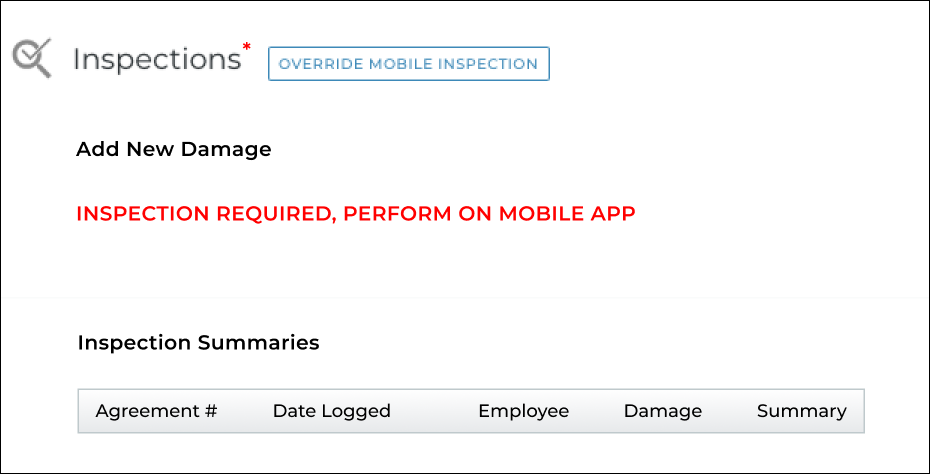
If using the new version of inspections, the inspection will be required to be performed on the mobile app. You can make exceptions for employees using the Override Mobile Inspection permission, in which an option will be available on the agreement to satisfy the inspection requirement on the web.
If you don't have permission to override this requirement, the following will be displayed in red text within the Inspections section: "INSPECTION REQUIRED, PERFORM ON MOBILE APP." In order to complete an open agreement after assigning a unit on the web, you must pend the inspection so it can be completed on mobile.
Inspection required, for employees without the override permission:
Hover to view the full-sized image.
Inspection required, for employees with the override permission:
Hover to view the full-sized image.
Note: If inspections are required for close, if the inspection is performed at close pend, it is not required at close since it was already performed when the unit was returned.
Screen Timeout (Seconds)
The number of seconds an employee at a location must be idle (that is, without any mouse movement, clicking, or typing) before the privacy screen displays.
Note: If the Screen Timeout (Seconds) is longer than the Session Timeout (Minutes) setting, the Session Timeout (Minutes) takes precedence. In this case, when the Session Timeout is reached, the privacy screen will not display and the employee will be automatically logged out.
![]() What can I do from the privacy screen?
What can I do from the privacy screen?
 in the lower right corner to do any of the following:
Session Timeout (Minutes)
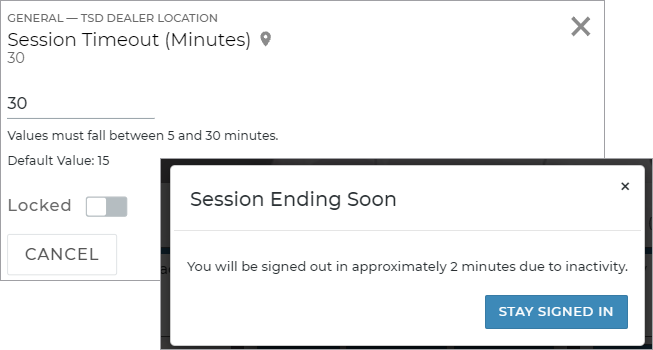
Use the Session Timeout setting to manage the number of minutes after which the web version of TSD DEALER automatically logs out any user session if there is no activity (that is, no mouse movement, clicking, or typing on any of your open tabs). You can enter a value of 5 to 30 minutes. It's set to 15 minutes, by default, which means if an employee at your location is idle for 15 minutes, the employee's session is automatically ended.
A Session Ending Soon warning message is displayed two (2) minutes before session timeout:"You will be signed out in approximately 2 minutes due to inactivity." A button is available for you to acknowledge the message and stay logged in, so you can keep working or save your work.
Signature Capture
Signature capture for agreements facilitates an optimal customer experience and eliminates the need for storing paper forms and having the customer sign a printed hard copy. A form with signature fields is required. Contact TSD Support at support@tsdweb.com.
Turn on this setting to send agreements for signature directly to your customer's device via email or text message, and allow customers to e-sign right on a device (using a finger or stylus).
Telematics Configuration
TSD Telematics is sold separately. Configuration must be performed by TSD Support. Contact your TSD Sales Representative at sales@tsdweb.com for more information.
This setting, unavailable for editing, is managed by TSD to set up TSD Telematics, which provides real-time fuel, mileage, and location information to help you assess availability, speed up your agreement process, plan maintenance, and recover fuel charges.
Telematics Hub Configuration
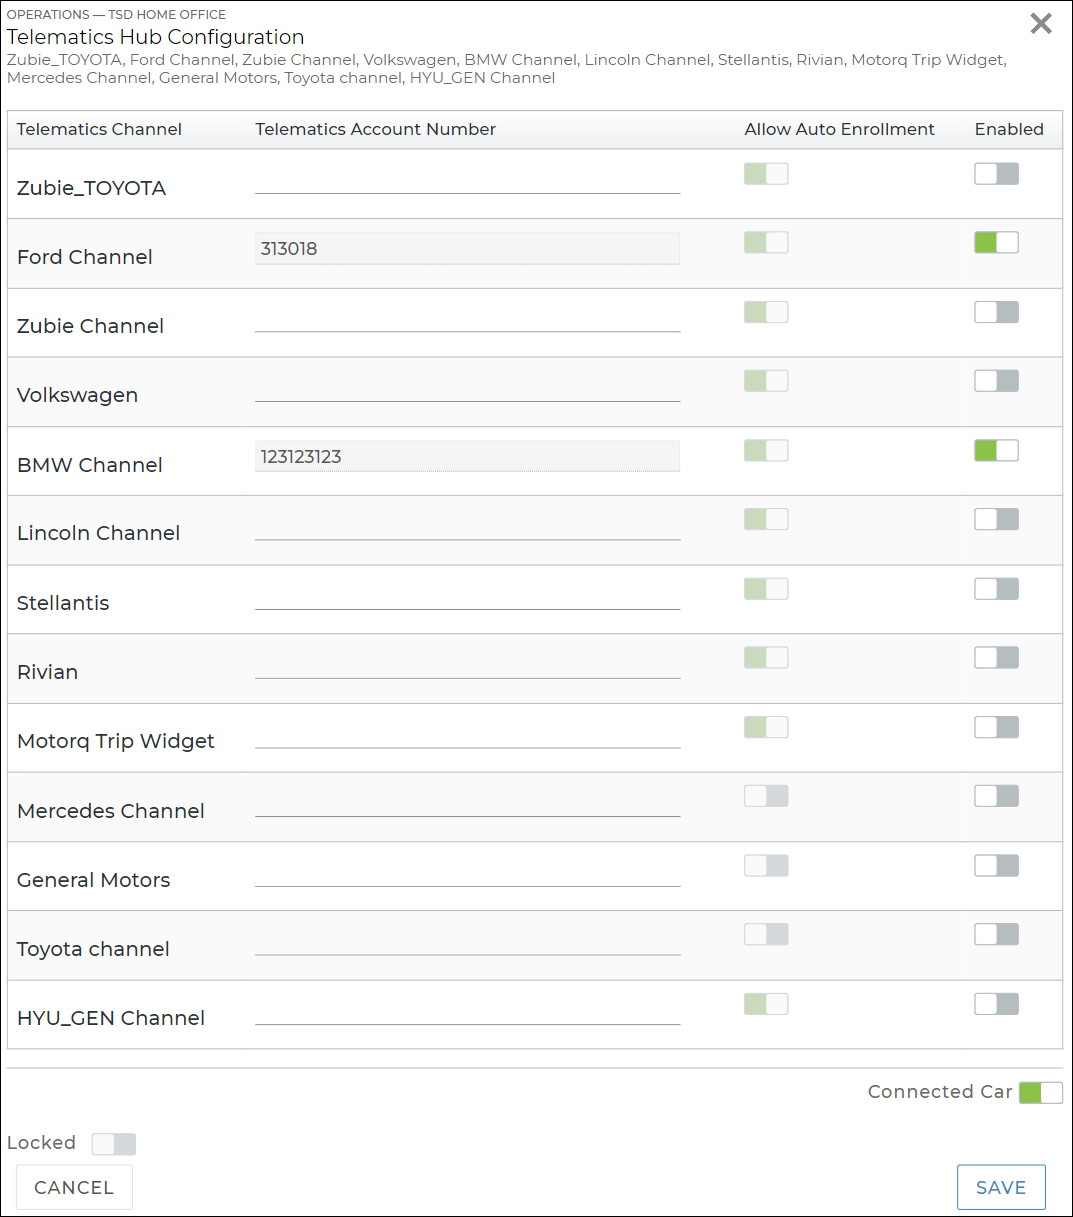
TSD Telematics is sold separately. Configuration must be performed by TSD Support. Contact your TSD Sales Representative at sales@tsdweb.com for more information.
Telematics add a new dimension to your fleet management by providing real-time fuel, mileage, and location information to help you assess availability, speed up your agreement process, plan maintenance, and recover fuel charges.
The Telematics Hub Configuration setting is managed by TSD and indicates whether your system is set up to retrieve telematics from one or more of our integrated providers, or "channels".
Turnback Date Notification Lead Time
Use this setting to have a message displayed on a unit record and on an agreement when the current date is within a certain number of days of the unit's Turnback Date.
Example: If you enter 100 as the Turnback Date Notification Lead Time, a message will be displayed at the top of a unit record and agreement when today's date is 100 days from the unit's Turnback Date.
Turnback Mileage Notification Lead Time
Use this setting to have a message displayed on a unit record and on an agreement when the assigned unit is within a certain number of its Turnback Miles.
Example: If you enter 1,000 as the Turnback Miles Notification Lead Time, a message will be displayed on an agreement when the unit's current mileage is 1,000 miles of its Turnback Miles.
Unit Default Return Status
Use this setting to determine the status to which a unit is automatically set after it is returned from an agreement. (This setting does not apply to Internal Use agreements.)
Units in Service (Days)
The Units in Service (Days) setting is set to 180 days, by default.
Use this setting to manage the In Service > [X] Days performance metric on your Fleet Performance dashboard. For example, if you enter 90, your Fleet Operations will display: "In Service > 90 Days".)
Units Idle (Days)
This controls the "Idle > [X] Days" metric in your Fleet Operations, which shows the number of units that have been idle more than a certain number of days. For example, if you enter 3, your Fleet Operations will display "Idle > 3 Days".
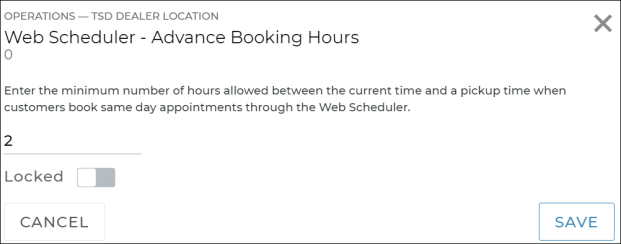
Web Scheduler - Advance Booking Hours
This setting is applicable for locations using TSD's Web Scheduler integration with an online booking process. See "TSD's Web Scheduler Integration for Rentals & Test Drives" for more information.
Use this setting to specify the minimum number of hours allowed between the current time and a checkout time when booking a same-day appointment through the Web Scheduler. That way, customers cannot book too close to the current time and you have adequate notice to prepare.
For example, if you enter 2 hours, then at 1:15PM, customers can only choose a pickup time of 3:15pm or later.
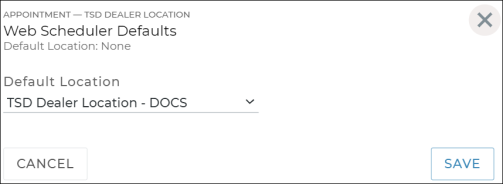
Web Scheduler Defaults
This setting is available at the dealership level only. (Make sure a dealership check box is selected in the Admin filter pane on the right.)
TSD DEALER offers integrations with third party web schedulers, or Business Development Centers (BDCs) to optimize your booking process and the customer experience. See "Web Scheduler Integration (BDCs)" for more information.
If your location uses one of these interfaces, you can use this setting to set the default pickup location for which incoming appointments are accepted through a web scheduler. This overrides any data received via your web scheduler feed.
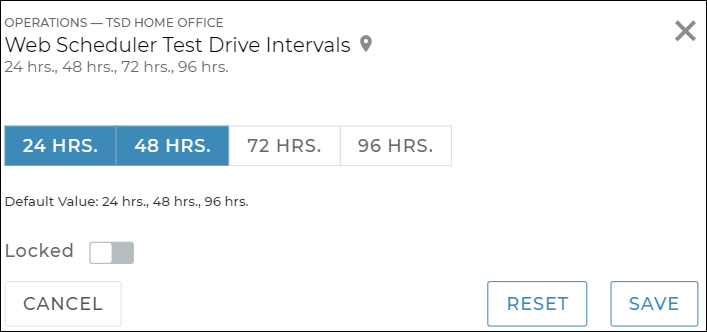
Web Scheduler Test Drive Intervals
This setting is applicable for locations using TSD's Web Scheduler integration with an online booking process. See "TSD's Web Scheduler Integration for Rentals & Test Drives" for more information.
When customers book an extended Test Drive through the Web Scheduler, intervals are used to set the return date and time.
Use this setting to choose which intervals are available: 24 hours, 48 hours, 72 hours, or 96 hours. Once the customer selects an interval, this will set the expedited return date and time. If you don't set these up, a message is displayed on the Scheduler that you (the location) must set up intervals.
Web Scheduler: Test Drive Terms and Conditions
The TSD Web Scheduler for online booking is sold separately. Contact your TSD Sales Representative at sales@tsdweb.com for more information.
This setting may be managed by your manufacturer and unavailable for editing (locked).
If you use TSD Web Scheduler on a website to optimize test drive bookings, you can make your location's terms and conditions for test drives available to your customers.
You can customize the style and format of this text, including the font, size, alignment, colors, and more.
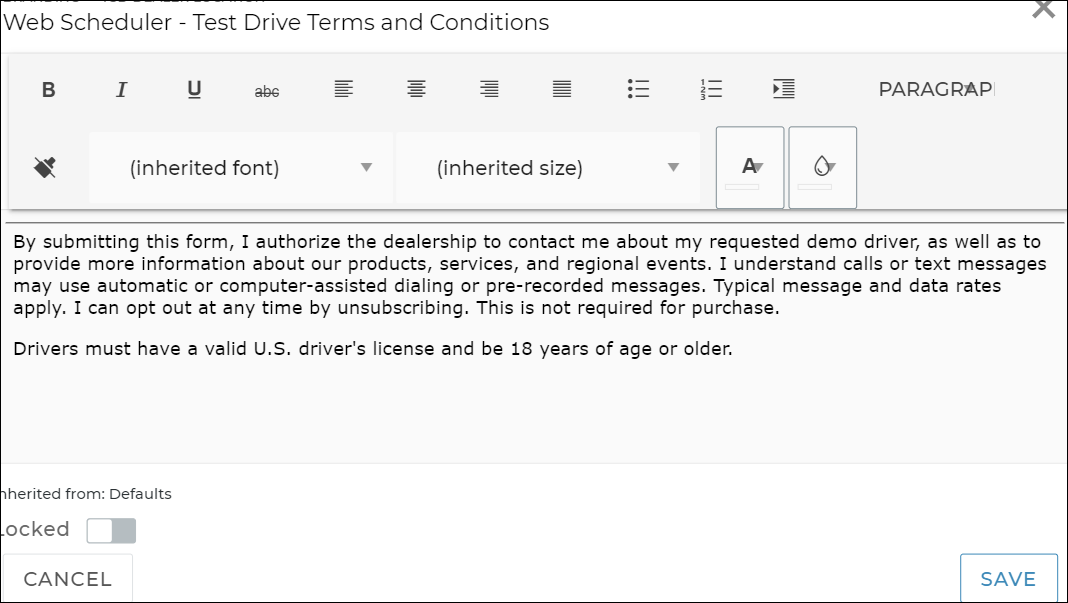
Hover to view the full-sized image.
These requirements are accessible to your customers via a link at the bottom of the Review tab of the Scheduler: "By continuing, I accept the Terms and Conditions." Clicking the link brings up the Terms and Conditions dialog, which contains the text and format set within the management setting.
© 2026 TSD Rental, LLC