
|
Expedited Appointments
TSD DEALER offers an expedited service option for your customers to speed up their experience by remotely accessing their appointments and updating information in advance of their checkout time or delivery.
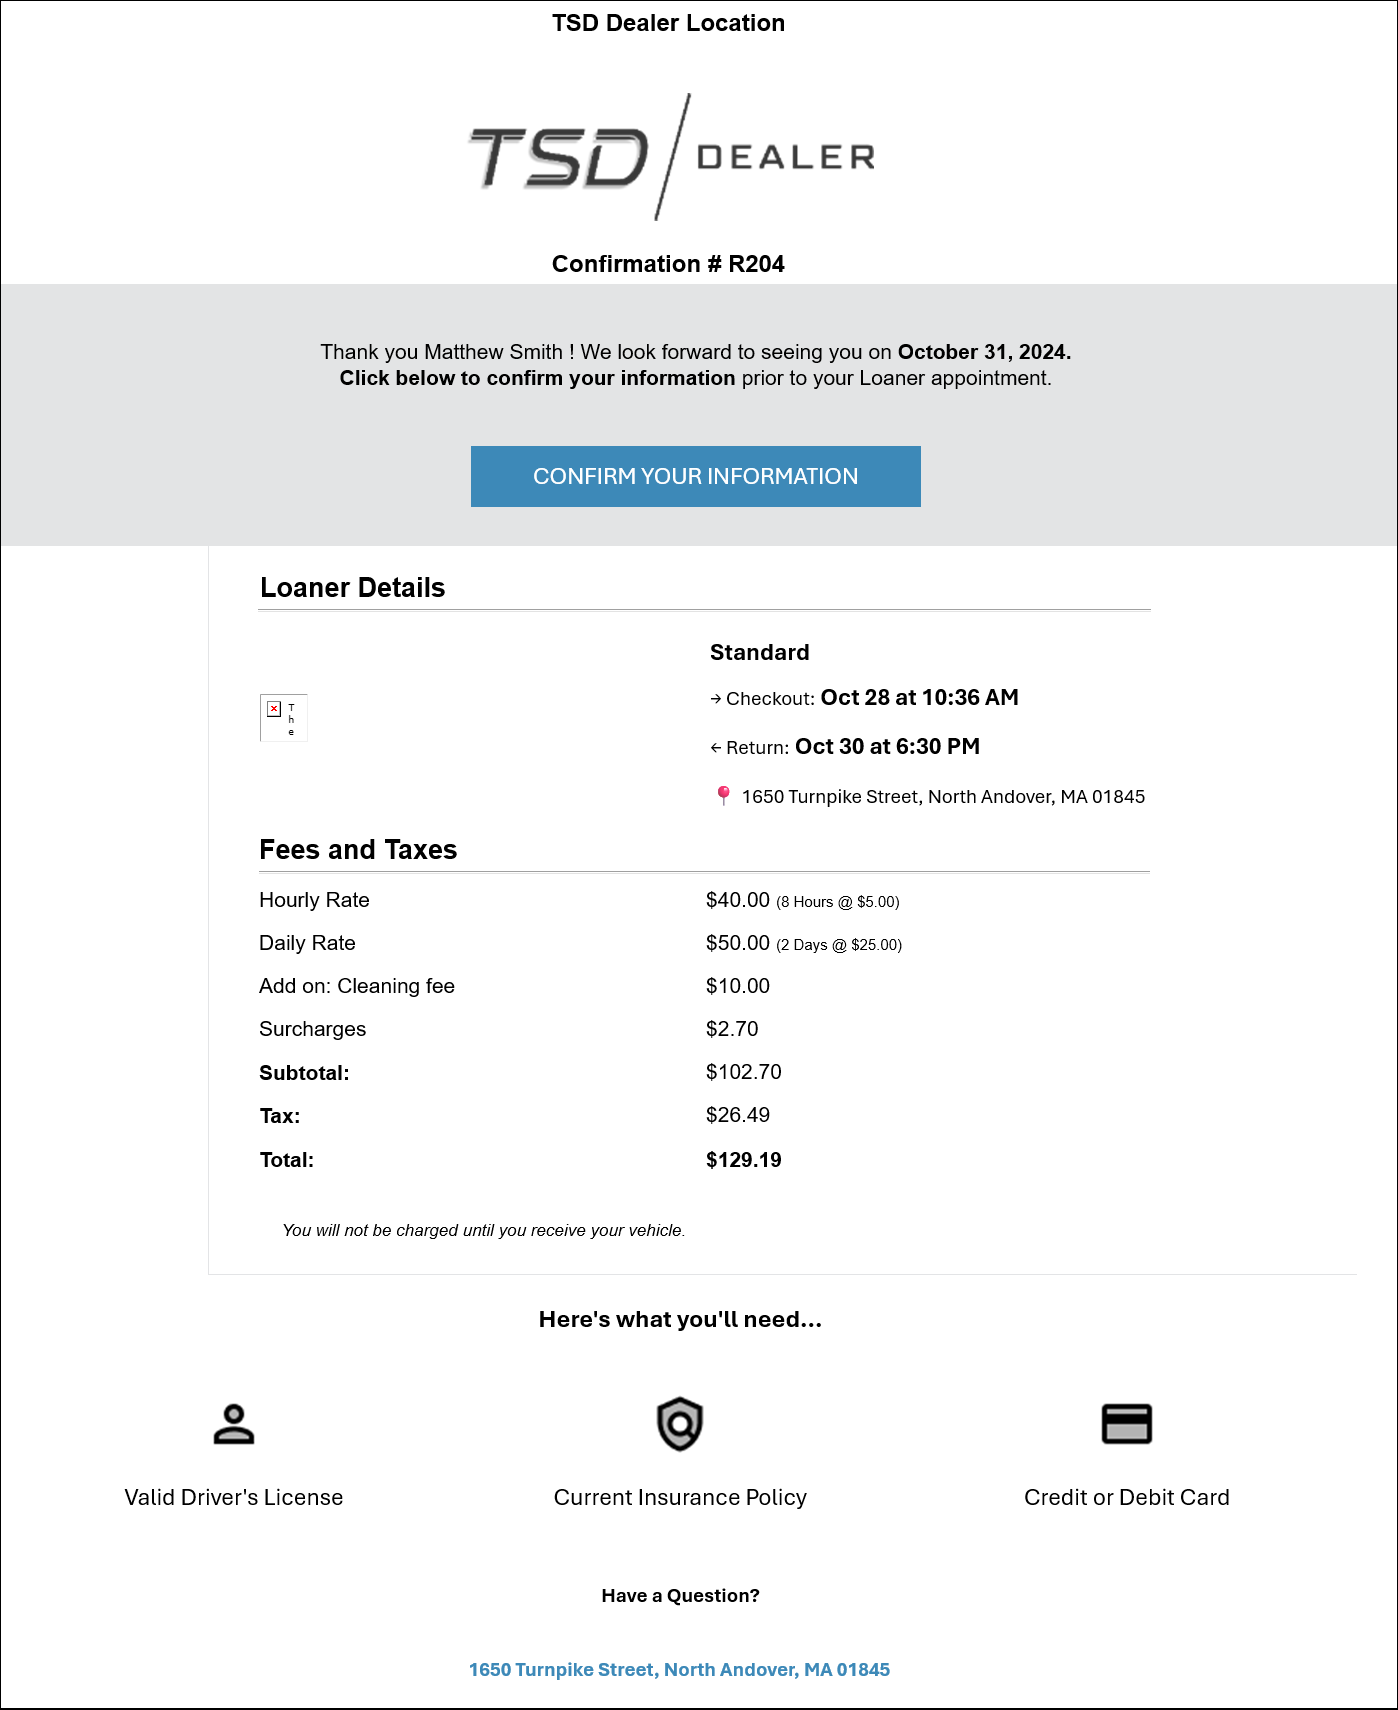
When your location is configured to use Expedited Appointments and an appointment is created in TSD DEALER or through an integrated Web Scheduler, a text or email is sent to the customer with a link to the appointment, so they can submit information in advance and have a faster checkout experience.
You can capture verified insurance policies in advance on expedited appointments with TSD DEALER's Insurance Verification integration. See "Insurance Verification Integration" for more information.
Setup Requirements & Options
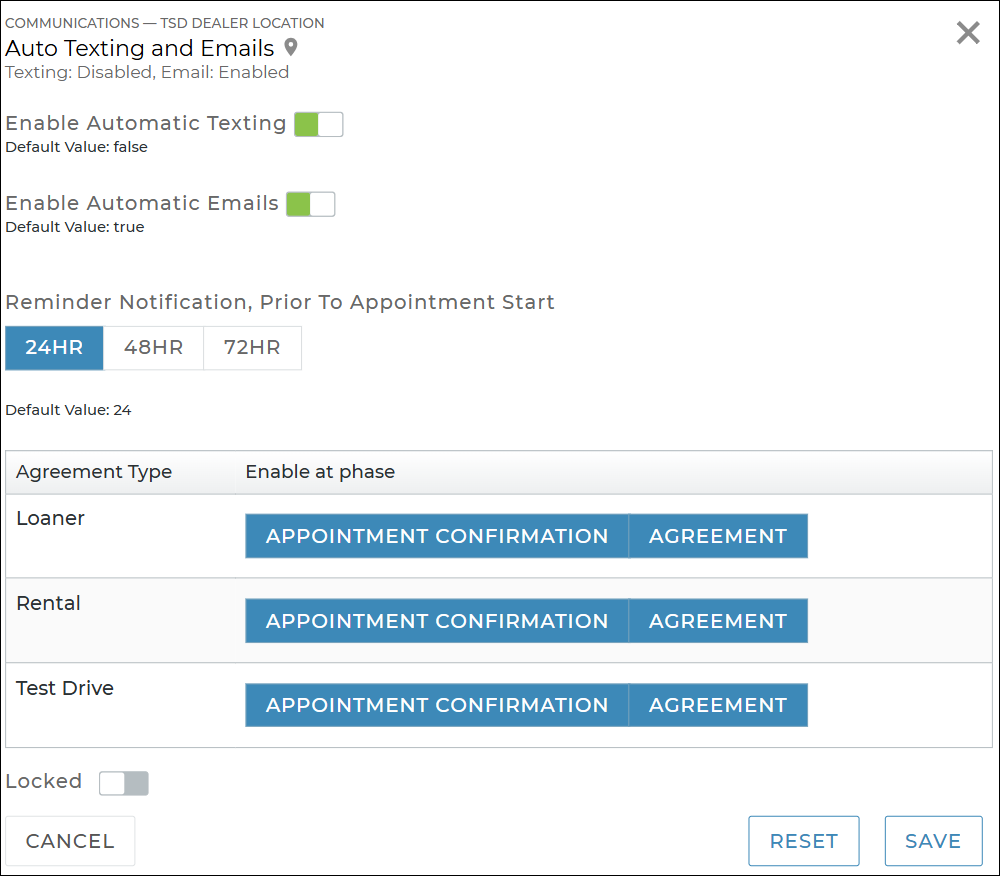
- Turn on automatic texting and/or emailing for appointments. Automatic texting or automatic emailing must be turned on for appointment confirmations within the Auto Texting and Emails management setting.
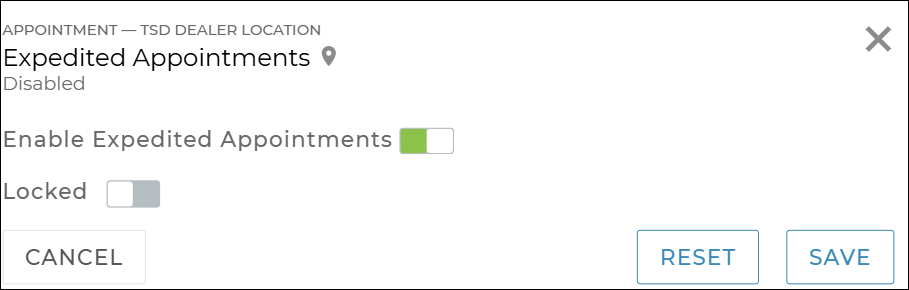
- Turn on Expedited Appointments. Turn on the Expedited Appointments management setting.
- (Optional.) Set up alerts when customers submit expedited appointments. Turn on the Expedited Appointment Submitted alert within the Alerts Hub setting so you can be notified when a customer submits expedited appointment information.
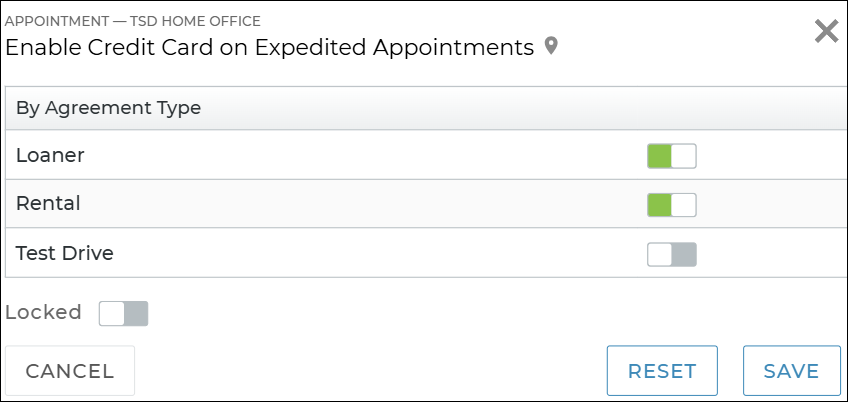
- (Optional.) Turn off credit card capture on types of expedited appointments. For locations with integrated Credit Card Processing, the Enable Credit Cards on Expedited Appointments setting is turned on, by default, for your appointment types, so the customer can submit a credit card for future payment. You can choose to turn off this setting for one or more appointment types, so the Credit Card Details and button are not present.
Hover to view the full-sized image.
You can further customize your emails by adding your location's logo (Dealership Email Logo Image setting) and changing the default email subject and adding additional text (Appointments Confirmation Message setting).
Hover to view the full-sized image.
Hover to view the full-sized image.
How it Works: Expedited Appointments in TSD DEALER
The Expedited Appointment Flow
From start to finish, here's the entire breakdown of how Expedited Appointments work in TSD DEALER.
- The appointment is booked. On the appointment, Text Allowed must be toggled on for texts, and Opt Out from Emails1 must be cleared for emails.
- An email and/or text is sent to the customer. The message contains a link to the appointment. (If the appointment's Checkout Date is tomorrow or another day in the future, an additional reminder text or email will be sent 24 hours, 48 hours, or 72 hours prior to the appointment's Checkout Date, based on your selection in the Auto Texting and Emails management setting.2)
- The customer accesses the expedited appointment and submits information. This includes name, address (including addresses for delivery and collection, if applicable), contact information, a driver's license, personal vehicle information, insurance, and a credit card (if applicable). See "Your Customer's Perspective: Submitting an Expedited Appointment" for more information.
- The appointment is updated in TSD DEALER. You can view expedited appointments from your Appointment Operations dashboard, receive alerts when expedited appointments are submitted, resend the link to the expedited appointment, and more. See "Your Perspective: Managing Expedited Appointments" for more information.
Your Customer's Perspective: Submitting an Expedited Appointment
When an expedited appointment is booked, a text or email is sent to the customer with a link to access the appointment and submit information in advance.
Here's what that looks like, from the customer's perspective:
- The customer accesses the appointment from the email or text message.
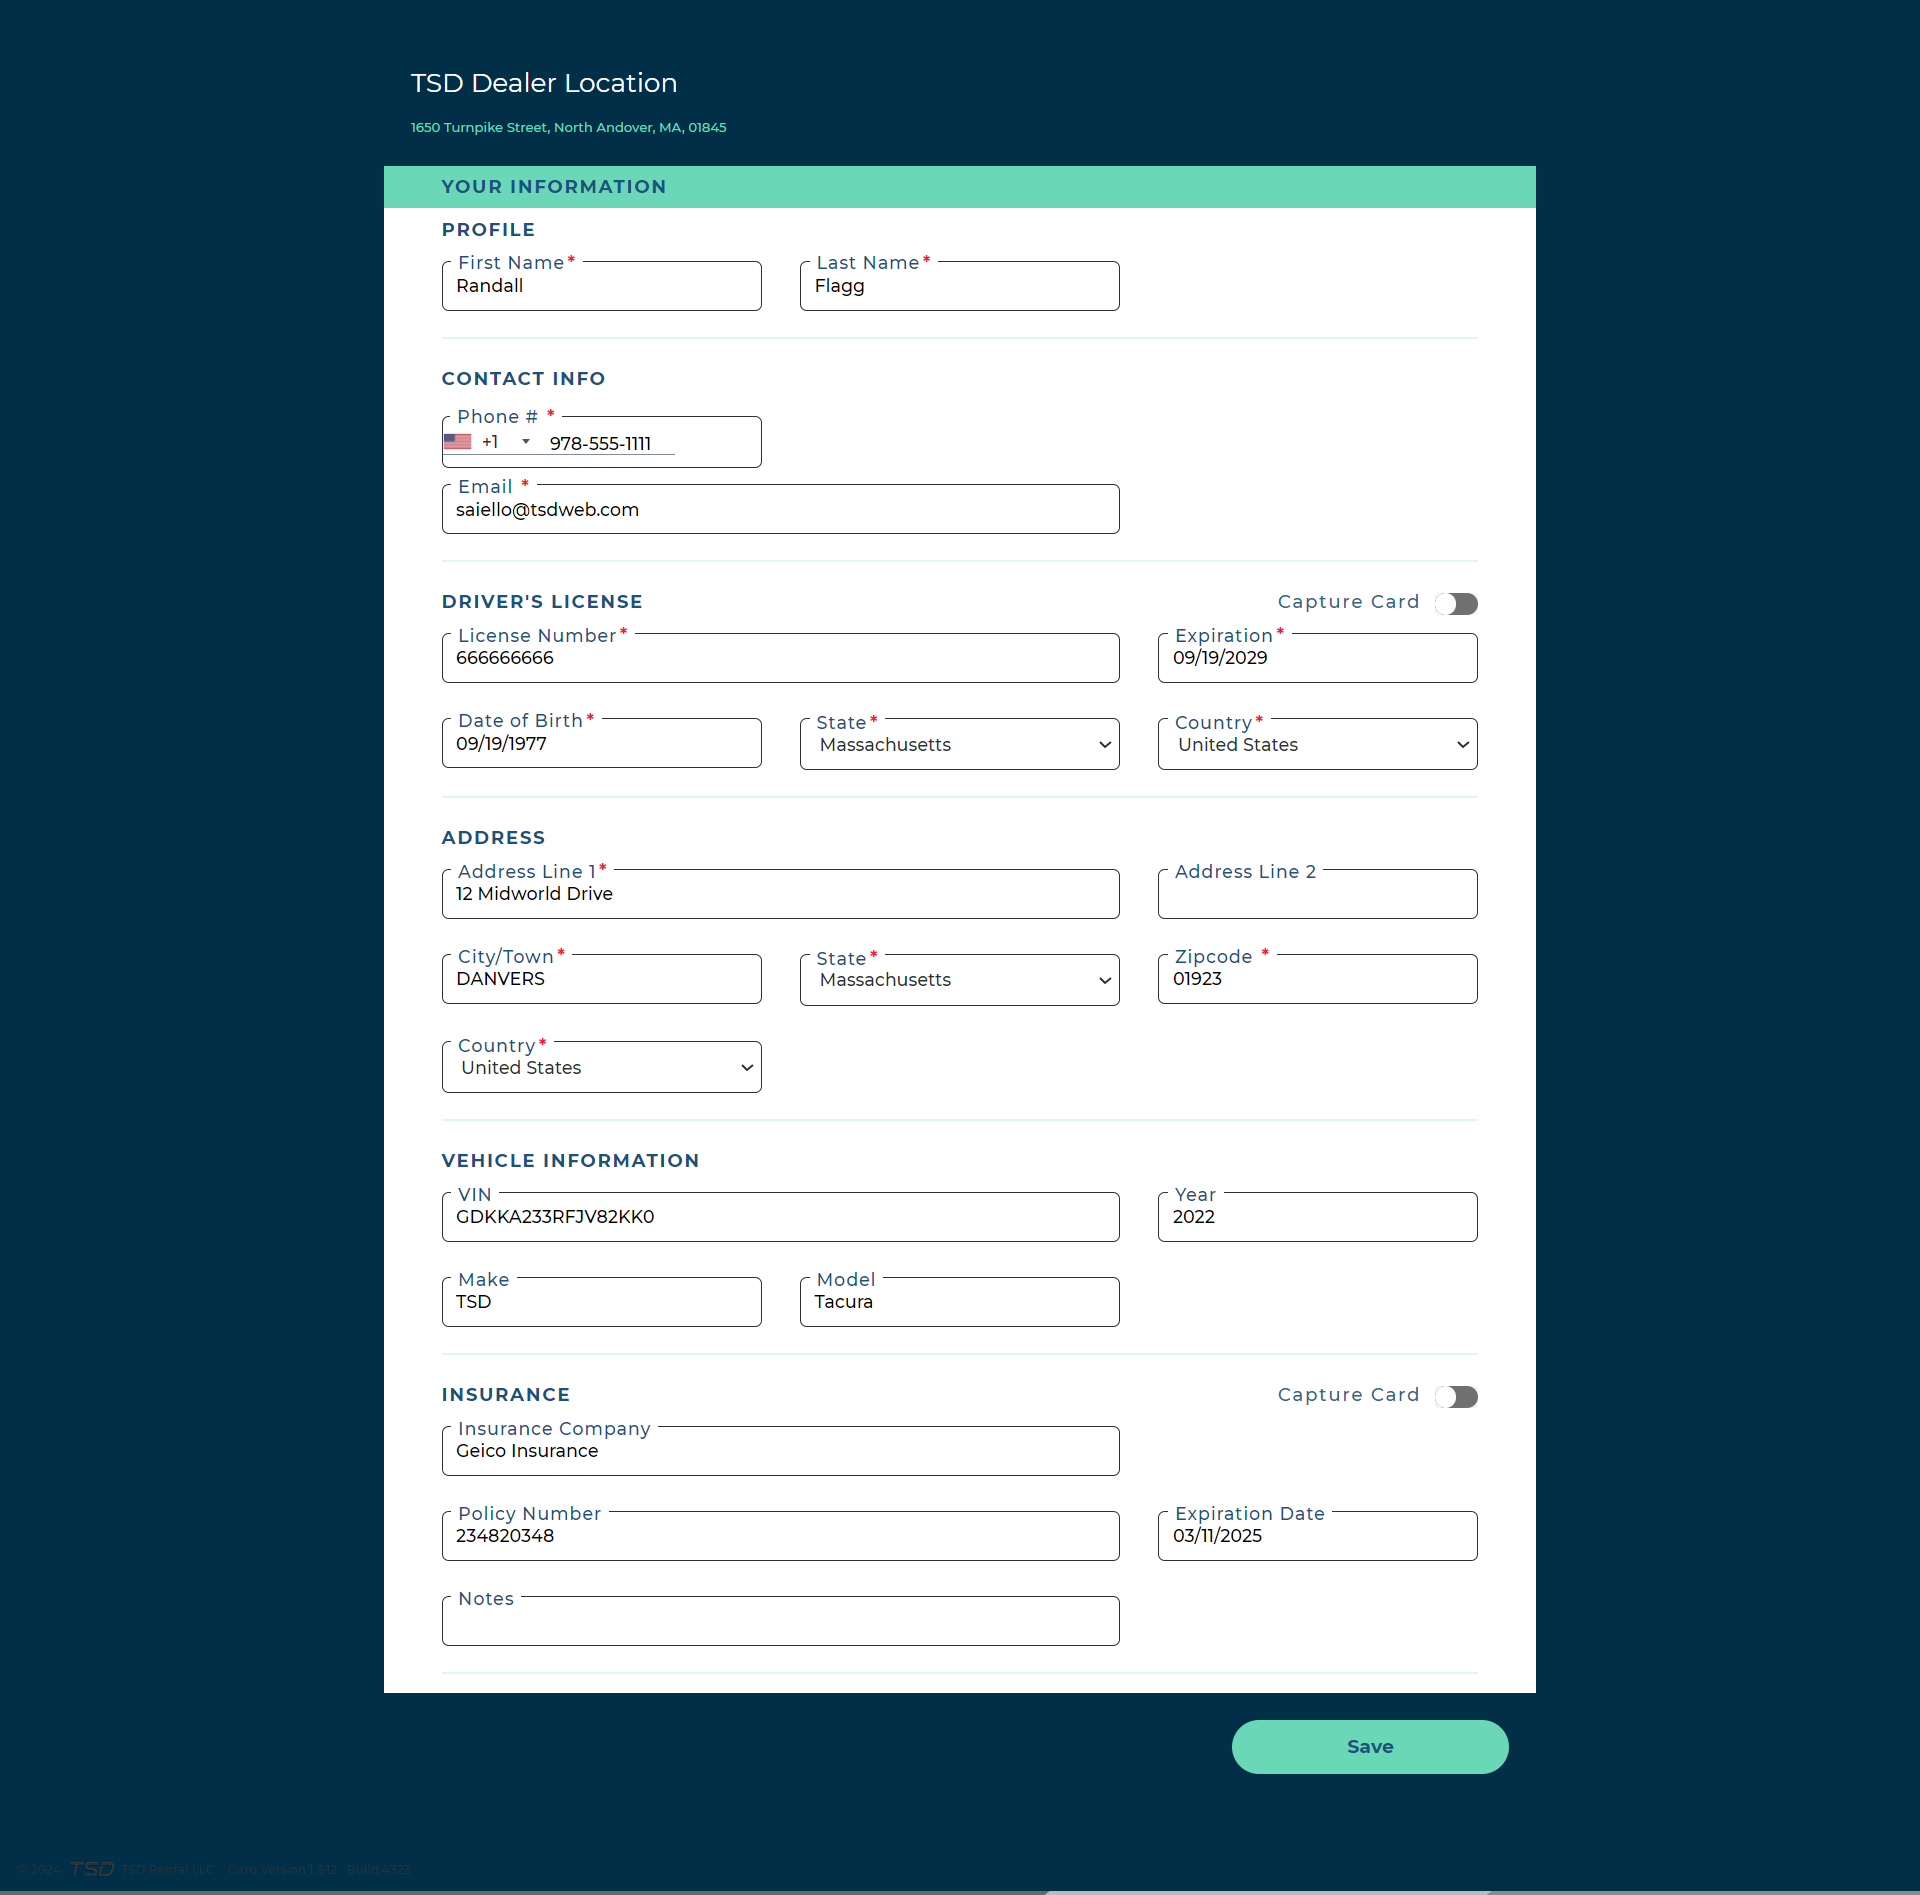
- The customer fills in required appointment information:
- Profile: First Name and Last Name.
- Contact info: Phone # and Email.
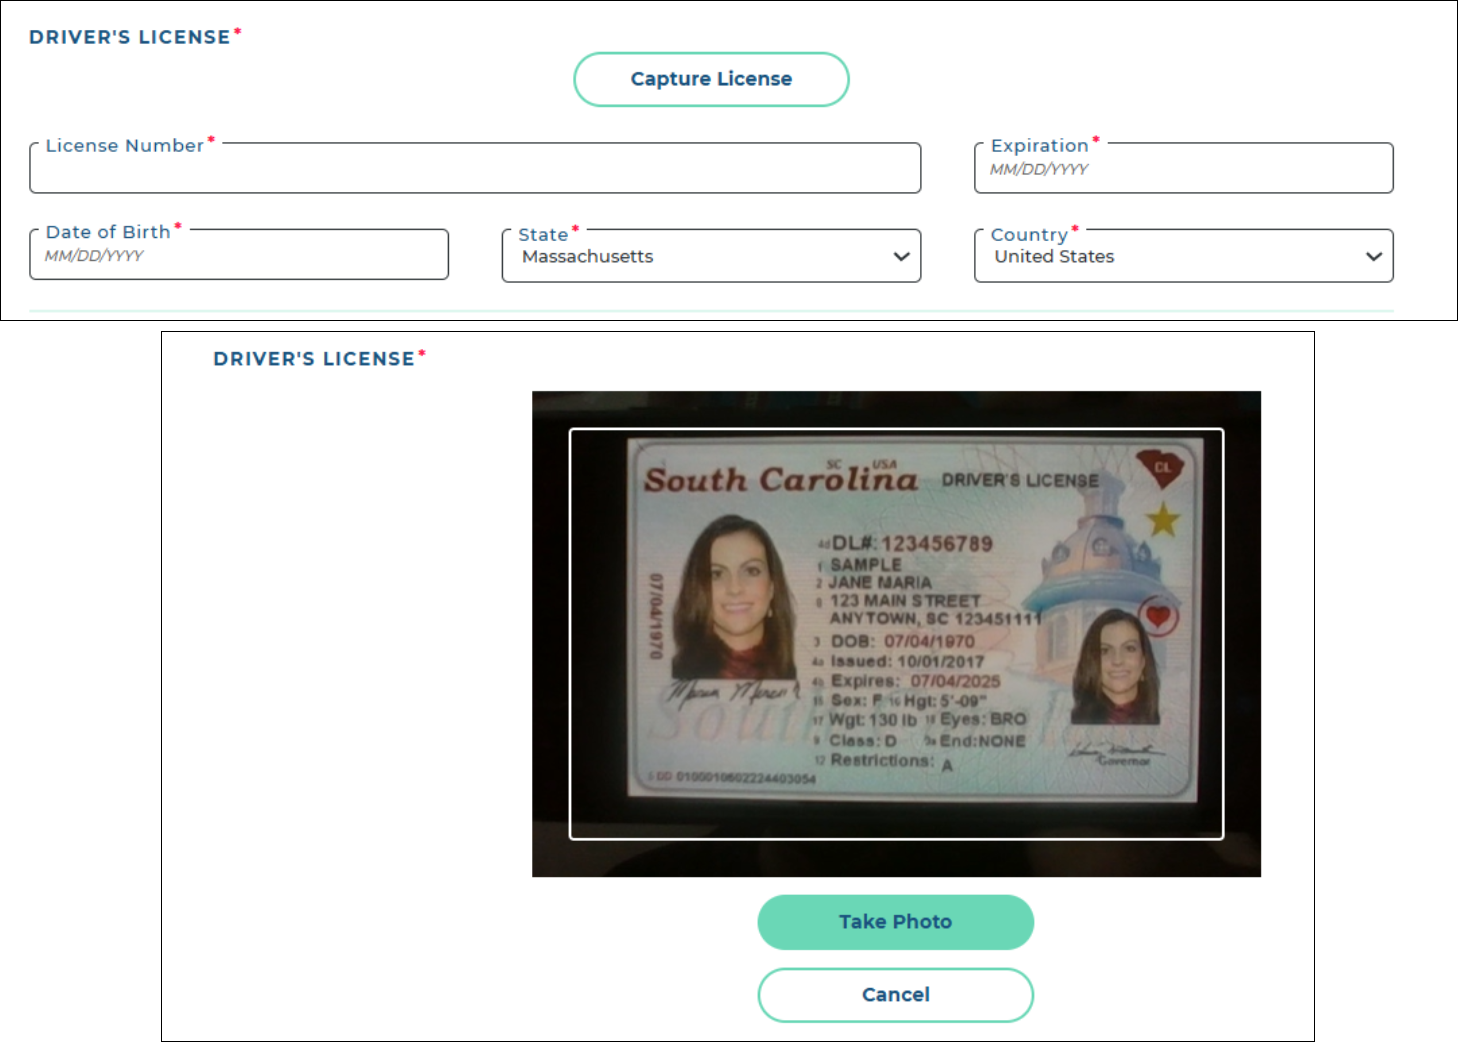
- Driver's license: Enter driver's license information (License Number, Expiration, Date of Birth, State, and Country), or tap take or upload photos of the driver's license, which will use Optical Character Recognition (OCR) scanning to fill in and validate the driver's license information fields.
- Address: Address Line 1, Address Line 2, City/Town, State, Zipcode, and Country.
- Delivery and collection address: For appointments marked for Delivery or Collection, delivery and/or collection addresses.
- Vehicle Information: VIN, Year, Make, and Model of the customer's automobile.
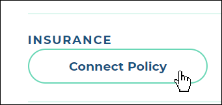
- Insurance: For locations using Insurance Verification integration with Axle or Canopy to capture and/or verify automobile insurance policies, the customer should click Connect Policy to launch the insurance dialog and connect a policy to update the appointment with verified insurance information. See "Insurance Verification Integration" for more information about how this works.
- The customer clicks Save to submit the appointment.
- A confirmation message is displayed for the customer.
Hover to view the full-sized image.
Note: If a customer and employee are simultaneously viewing or editing an appointment, the customer may need to reload the appointment if updates have been made.
Note: Any information required on an agreement is also required on the expedited appointment. See "Manage required fields on appointments and agreements" in the Management Hub topic for more information about making certain information required. For example, if insurance information is required to save an agreement, the customer must fill out insurance information to save the appointment.
Hover to view the full-sized image.
Note: How long do customer driver's licenses remain in the system? ![]() Read more
Read more
Hover to view the full-sized image.
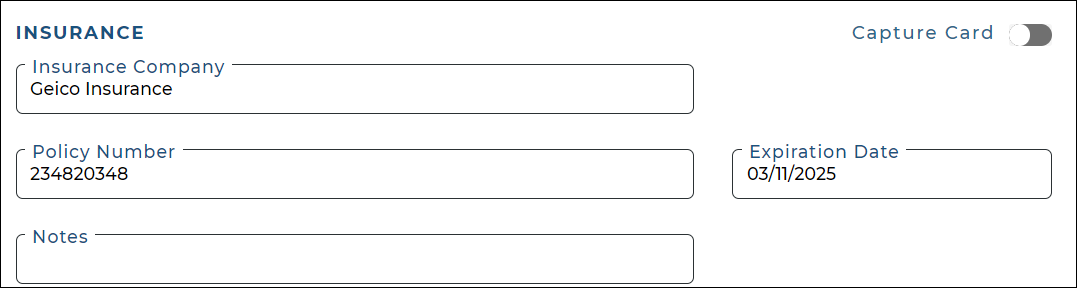
Otherwise, the Capture Card toggle is on, by default, to take or upload front and back photos of the insurance card. Or, you toggle it off to make the manual entry fields available: Insurance Company, Policy Number, Expiration Date, and Notes.
Hover to view the full-sized image.
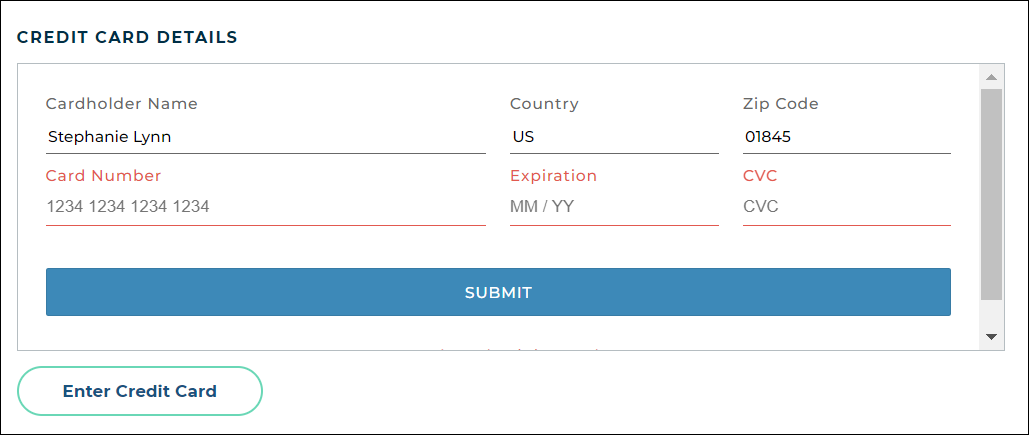
Credit Card Details3: If your location uses Credit Card Processing and you location has enabled credit cards on this type of Expedited Appointment, a Credit Card Details section is available for the customer to enter credit card information (Card Number, Expiration, and CVC). (Cardholder Name, Country, and Zip Code fields are filled in from the appointment, but can be edited). See "Credit Card Processing" for more information.
Hover to view the full-sized image.
Once card information is submitted (or if it is already present on the appointment), customers can view the card details (last four digits of the card number and expiration), and choose to change the card on file by clicking the button.

Hover to view the full-sized image.

Hover to view the full-sized image.

Hover to view the full-sized image.
Sample Expedited Appointment Screen:
Hover to view the full-sized image.
Your Perspective: Managing Expedited Appointments
When an expedited appointment is booked and a text or email is sent to the customer with a link to access the appointment and submit information in advance, there are several options available for your location to keep tabs of these types of appointments.
Receive Alerts When Expedited Appointments are Submitted
You can turn on an Expedited Appointment Submitted alert so you can be notified when a customer submits expedited appointment information. See "Alerts" for more information.
View Expedited Appointments
You can access Expedited Appointments (that is, appointments in which customers have accessed the appointment and submitted information) on your Appointment Operations Dashboard's Expedited hub card.

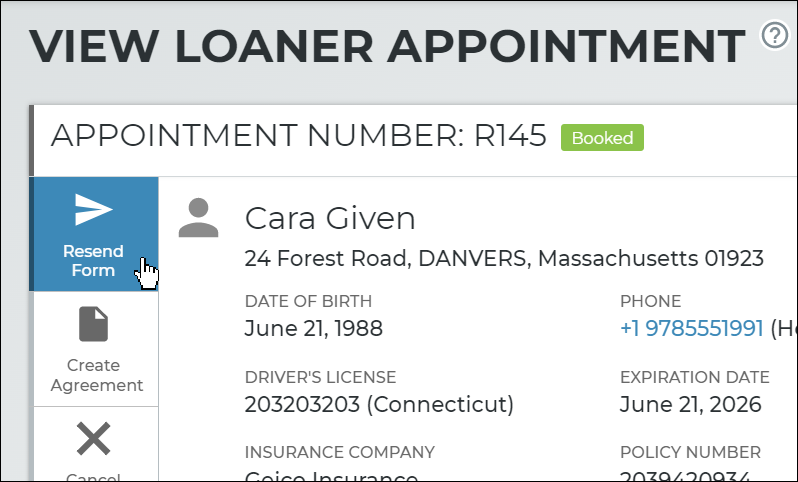
Resend an Expedited Appointment Link
If the link to the appointment has expired or the customer is otherwise having trouble accessing the appointment, you can manually resend the expedited appointment link to the customer using the Resend Form button on the side panel of the appointment, as long as the Checkout Date and time is at least one (1) hour into the future. (In this situation, the application displays a brief message in the bottom left corner: "Contactless form not sent; Reservation must start 1+ hours in the future.")
Hover to view the full-sized image.
Note: The 1+ hour future Checkout Date and Time restriction for resending the form does not apply when the appointment is set for Delivery or Collection, for locations with TSD's Delivery and Collection integration, so you can always resend the URL to the customer regardless of the Checkout Date and time.
The method by which the form is sent is based on whether the customer's phone is filled in and Text Allowed is enabled (for texting), or whether the customer's email address is filled in and the Opt Out From Emails option is cleared (for emailing).
© 2026 TSD Rental, LLC